|
STAGE BY STAGE |
|
Essential
Supplies
The items you will need to complete this scene are as
follows:-
Watercolour Paint
Burnt Sienna
Yellow Ochre
Raw Umber
Ultramarine Blue
|
Brushes
3/4" Wash brush
No.8 Round
No.3 Rigger |
|
 |
|
|
|
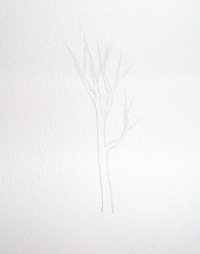
Firstly, here's my quick outline of a winter
tree. It has to be said that in normal circumstances I wouldn't bother to
do this drawing, but at least this way you can see what you are doing.
|
|
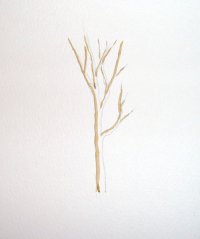
Now using my No.8 brush I'm
putting a few strokes of well watered yellow ochre up the left-hand side
of the tree. Now whilst this is still wet, with the same brush and using a
mixture of ultramarine blue and burnt sienna, fill in the rest of the
tree leaving a few tiny touches of the white paper showing through here
and there.
|
|
|
|
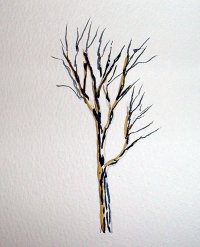
As I get to the top part of
the tree, still using the same colour mix, I'm changing to my rigger brush
so I can have a few finer twigs. Don't go mad with these, you really do
just need a few.
|
|
Now still using my rigger
brush and still with the same colour mix, lay the full length of the brush
against the trunk of the tree and flick outwards.
|
|
|
|
And there are your few bits
of rough growth coming out of the side of the tree, still using the rigger
brush add a few twigs to these.
|
|
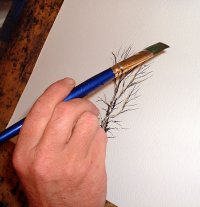
Now changing to my 3/4"
flat wash brush, and the same mixture of ultramarine
blue and burnt sienna, tap on for the top canopy of twigs. Notice I'm not holding my brush like a pencil, hold it
this way and tap on so the full length
of the brush taps onto the paper.
Use the full length of
the brush like this. |
|
Do hold your brush like this.
|
|
|
|
That's how simple a winter
tree can be.
|