|
STAGE BY STAGE |
|
Essential
Supplies
The items you will need to complete this scene are as
follows:-
Watercolour Paint
Burnt Sienna
Yellow Ochre
Raw Umber
Cobalt Blue
Charles Evans Sand
Light Red
Ultramarine Blue
Hooker's Green
Alizarin Crimson |
Brushes
1.5" Washbrush
3/4" Wash brush
No.8 Round
No.3 Rigger |
|
 |
|
|
|
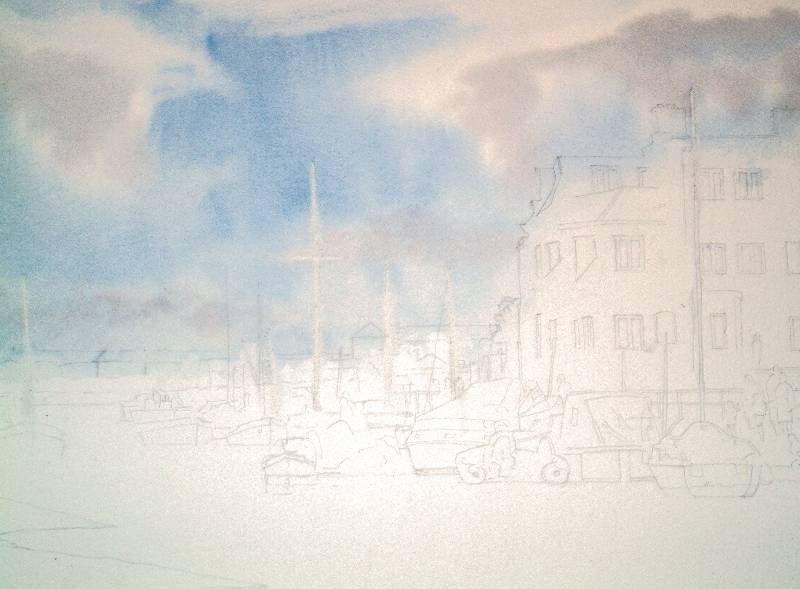
In Figure 1 you will
see I’ve done a fairly detailed outline pencil sketch and just blocked
in my sky wash, which was very simply cobalt blue using my 1.5"
Dalon wash brush then squeezing out the brush and suck out some light
areas for clouds. Then in the bottom part of the clouds, add a
touch of light red to the blue and put this nice warm grey colour as
cloud shadow. Notice for the masts and white areas in the sky, I
haven’t used any masking fluid, I’ve simply washed out my 3/4"
Sapphire wash brush, sharpened it between my fingers, and run a line down
the mast to suck out the paint. |
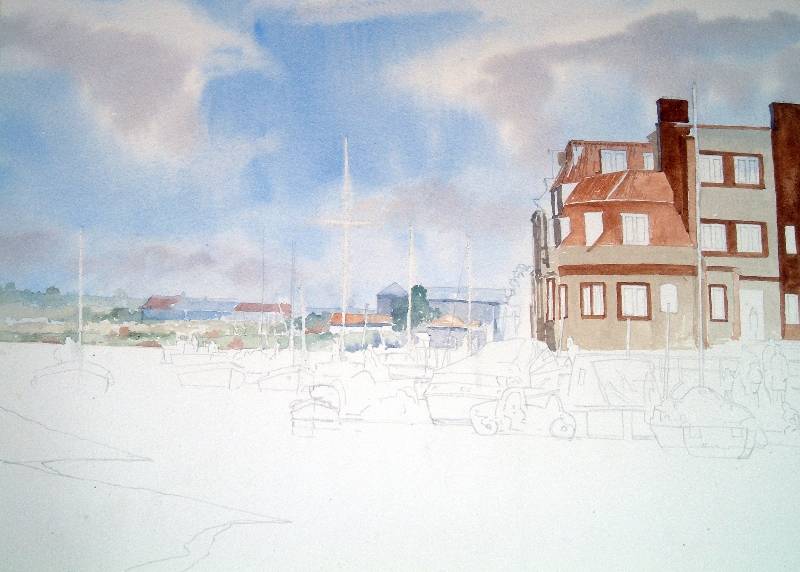
I've shown the distant
buildings very faintly as I don’t want these to be too prominent in
the painting. For this I have used a mixture of cobalt blue and light
red, and for the roofs burnt sienna. For the trees, these are just a few
blobs of Hooker's green with a tiny touch of cobalt blue mixed in. The
sandy bit at the base of the grasses, I’ve used the new Charles Evans
sand colour, well watered down.
|
|
|
|
The main building is a
beautiful old building but quite difficult to paint because it's a
mixture of flint with red brick interspersed. Now normally the colour of
flint is a very difficult colour to make, I’ve simply used the Charles
Evans sand colour and for this I have used my No.8 round Sapphire. Then
once I had applied the sand colour, I split the brush and stippled on dry
brush strokes with a touch of raw umber, followed by a touch of burnt
sienna. For the red brick parts of the building I’ve used a
mixture of burnt sienna and raw umber. |
|
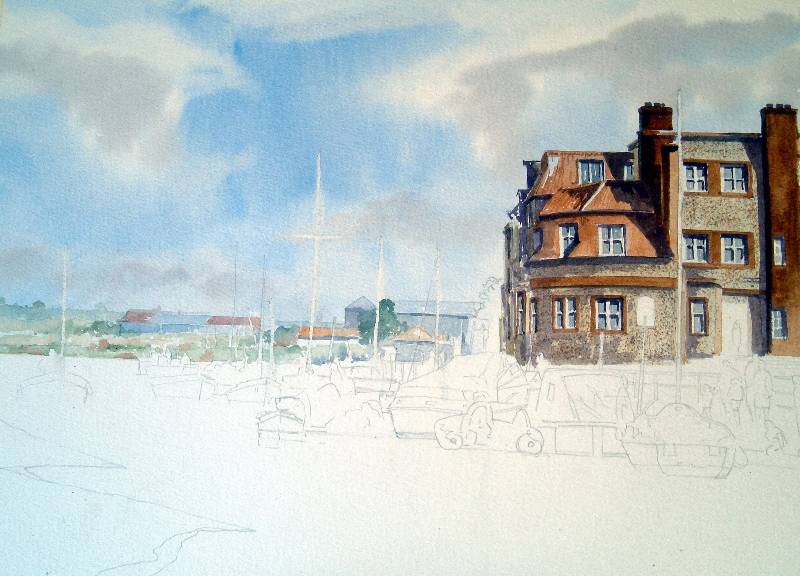
In Figure 4 you will
see that I have added the windows but I’m not painting window frames,
I'm just painting window panes, with a mixture of ultramarine blue and
burnt sienna, using my No.8 round brush, paint the panes leaving the
outside edges white paper. Also to the building I’ve now added all of
my shadow.
Still using my No.8 round brush and a mixture of ultramarine
blue, alizarin crimson and a touch of burnt sienna, remembering that I
want the light to be coming from the right. Quite simply, think what is
going to cast a shadow from one part of the building to another part of
the building, for instance look at the strong shadow to the left of the
chimneys and underneath the window frames. |
|
|
|
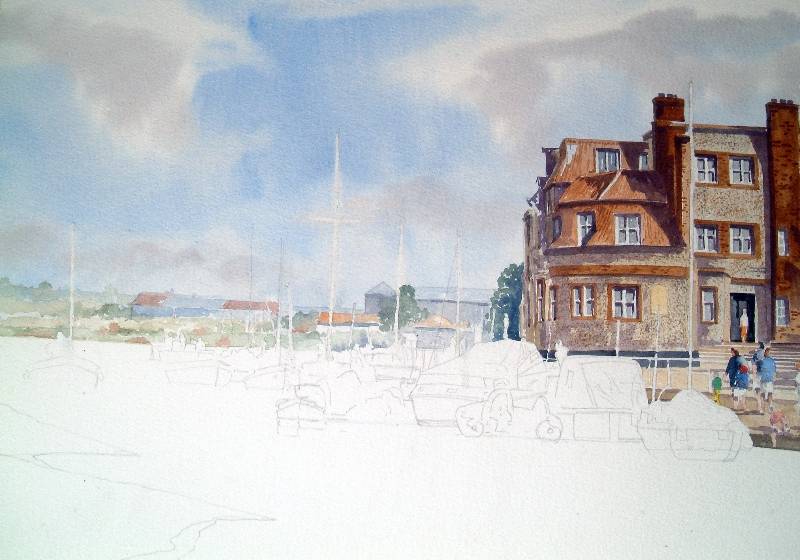
In Figure 5 you will see
that I have added some life in the form of a small group of people to the
right. Don’t get tied up in lots of detail, simply do blocks of
different colour clothing and for any flesh that is showing (which is not
much) I’ve used a mixture of alizarin crimson, yellow ochre and a tiny pin
head of ultramarine blue. For the people I’ve used my No.8 round brush
not forgetting again a little bit of shadow, the same shadow colour as in
the building. Also, in between the building and the people, I’ve added
the roadway and the steps using a mixture of yellow ochre and raw umber,
for this I used my 3/4" wash brush.
|
|
Again don’t go into
too much detail with your boat. As you can see I have used lots of different
colours, but if you look at boats in the harbour, there are lots of
different blues in them. I've just used two, ultramarine blue and
cobalt. I used my No.8 round brush for all of the boats, apart from the
darker sides of the masts when I used my No.3 rigger brush and a mixture
of ultramarine blue and burnt sienna. Remember again to cast shadow
from one boat to another. You know that difficult colour that seems to
be on the bottom of most boats as it comes out of the water, it's
simply light red. Note at this stage, that I’ve also painted the
reflections in under each boat. |
|
|
|
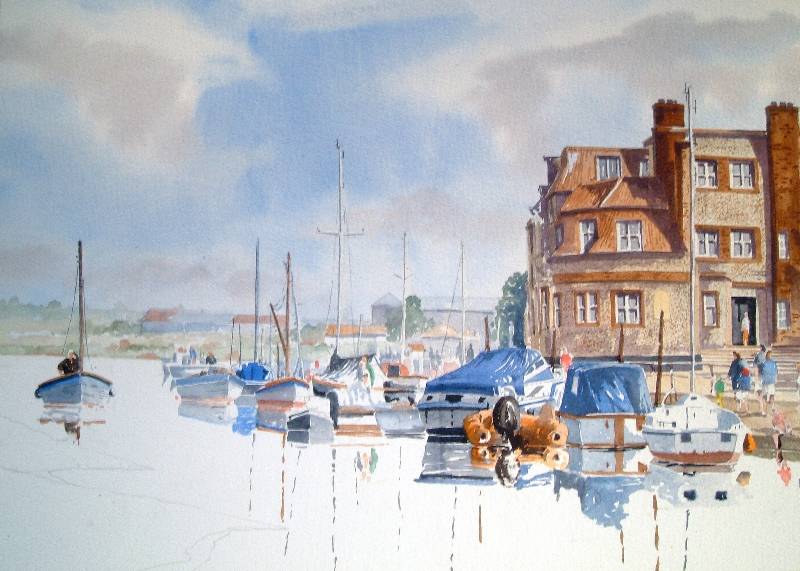
In the finished picture
you will see that I’ve painted in the water and the sandbank to the
left. Even though the new Charles Evans Colours are called the Seas & Sand,
with the British sea colour in particular, if you water it down enough is good enough
for any river not just the sea. That’s what I’ve used here, well
watered down and then whilst it was still slightly damp, used a Charles
Evans British sea colour, stronger, to denote some movement and ripples in
the water, notice again with my 3/4" wash brush I’ve sucked out the white bits
vertically for the white masts.
The sandbank or mud flat to the left
I’ve used the Charles Evans sand and then once dried touched on with a bit
of stronger Charles Evans sand and then put a hint of the shadow colour in
over the top. The sand colour is particularly useful as you will see
I’ve used it in the building and also for the mud flat, as well as the
sand bit in the far distance. You can mix the colour up or down to achieve
any effect you want, make it lighter, make it darker, but also because it's
straight from the tube, it's a very light colour but not opaque like white.
You can use the sand to lighten other colours as a mixer.
|