|
|
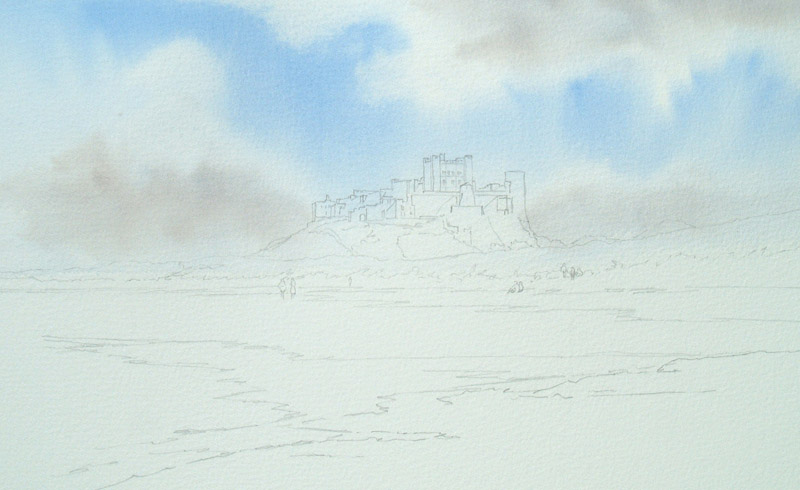
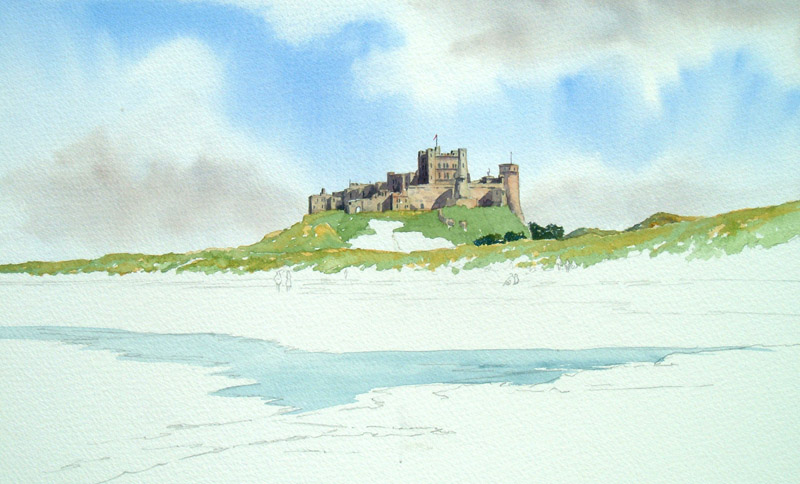
As you
will see from my drawing it looks fairly complex, but basically it's just
a simple outline drawing. No crosshatching, no shading, no messing.
Notice I have put the indication of a few people on the beach, in the
distance and middle distance, just to add a little bit of life.
|
|
And then in with the sky wash.
All I’ve done with my 1.5" Dalon wash
brush, which is totally synthetic, is pre wash the whole sky area and then
drop in some cobalt blue. Let it run a little bit then suck out some
light cloud areas by simply washing out my brush, squeezing out and then
twist and drag across the paper. Whilst this was still sopping wet put a
tiny touch of light red into my cobalt blue and drop in some cloud
shadow areas. |
|
|
|
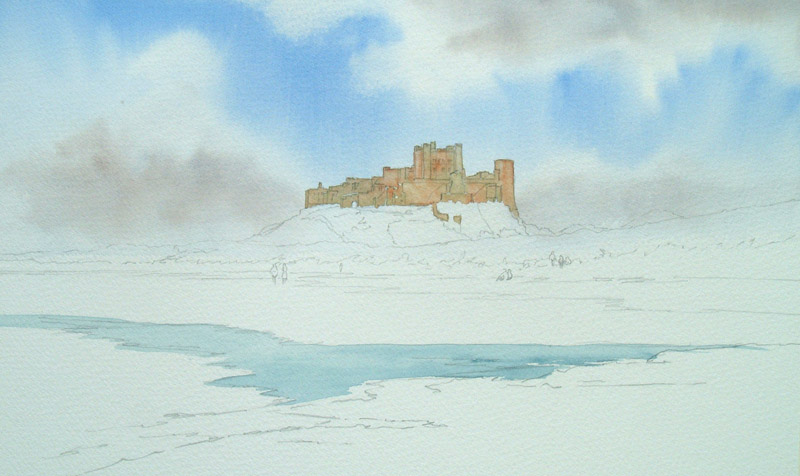
At this
stage I’ve put a little slither of the Charles Evans Mediterranean sea
colour (which is a ready mixed colour for painting the sea) in the
foreground beach area. The main base blue of this mixture is cobalt
blue, therefore it doesn’t contradict the sky.
Once my sky has dried I am now mixing Charles Evans sand with a tiny
touch of raw umber. The Charles Evans sand colour, again a tubed ready
mixed paint, has far more worth than just painting beaches. For
instance, like this, use it for stonework. Mixed with a tiny touch of
raw umber, as you will see, it’s a perfect colour mix for stone. It's
also a brilliant colour for lightening other colours. As you know you
should never use white paint in watercolours so quite often people don’t
use white paint in the actual picture but will use white to lighten
other colours, instead use the sand. It will lighten your other colours
without making them muddy.
All I am doing here with my No.8 round brush,
which is called the Sapphire, and I use these because they are a mix of
sable and synthetic and therefore will do the job of both brushes.
Simply block in the whole castle with this mixture and then whilst it is
still slightly wet, drop in a few hints of light red here and there just
to warm up that stone, because this is a lovely warm honey coloured
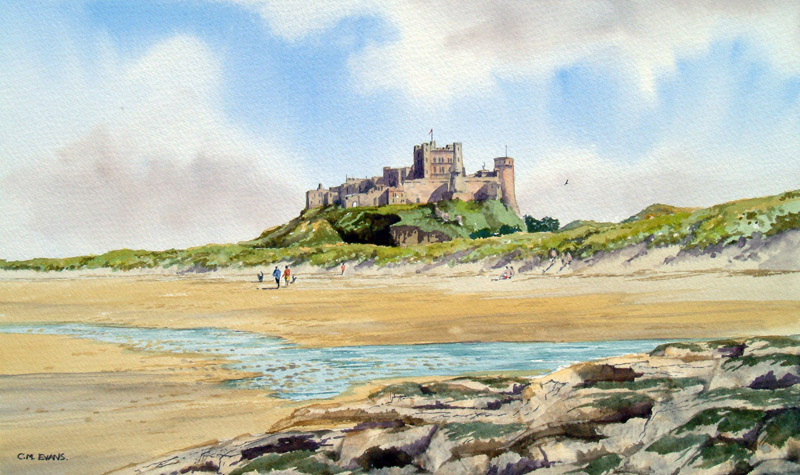
stone. Bamburgh Castle is a very imposing and impressive building. It
was of course not always like this, it was of course a lot smaller. We
once made one of our TV programmes about Bamburgh Castle and because of
this the TV researchers have to go into quite a lot of research to find
out about whatever subject we may be doing. The castle was originally
built by the then King of Northumberland in 1200 and something and he
basically picked the most inaccessible piece of land has his men dig or
drill down as far as possible until they hit water and then he built his
castle on that because then is controlled the water for the area. It has
seen many battles and skirmishes, but these days of course amongst other
things, it’s a beautiful place to paint. |
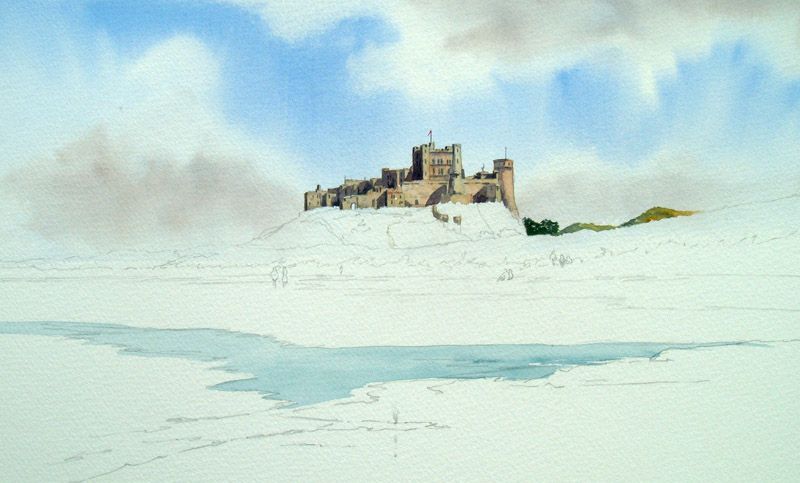
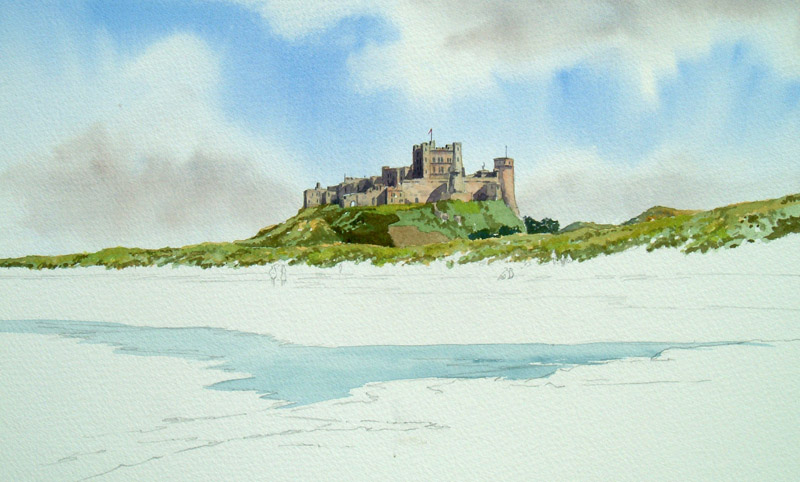
Whilst
I'm waiting for this to dry, I am going to do some bits and pieces of
distance, which are some trees a long way off. And I'm using my No.8 round
brush again the Sapphire, and a mixture of Hooker's green and burnt
sienna. There are also a couple of sand dunes in the distance. In these
again Hooker's green, but this time with yellow ochre. I don't make my own
greens for the simple reason, I travel all over the world all the time and I
need a lot of greens, which means I would have to carry every kind of
blue, every kind of yellow and quite a few colours in between, it's a lot
of colours to carry. Hooker's green however straight from the tube is a
horrible colour. But if I take it out of the equation of the eight main
colours I use all of the time, mixed the other seven in one at a time, that
gives me seven different lovely greens, mixed a third colour into some of the
mixes and I've got five secondary greens. So I’ve got about twelve greens
straightaway.
Once I've done my distant sand duney bits, I am then going
into a few little bits of detail mainly windows before I put the shadow
in, because of course it's always the shadow that brings any building to
life, or for that matter any tree, hillside or hedgerow. Remember no one
is going to look at your building and say, “That can't be Bamburgh Castle
because he's only got ten windows in there and I know there are fourteen”. They
are going to look at the general shape and makeup of your subject and
say, “Hey look, there's Bamburgh Castle”. What I’m saying here is don’t
get bogged down by too much detail.
|
|
|
|
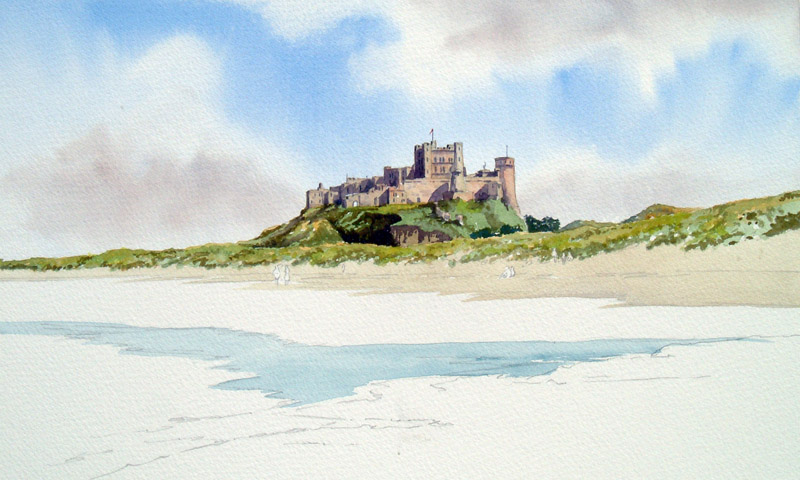
Now it's time for the shadow. And again I’m using my cobalt blue, but this
time mixed with a touch of alizarin crimson so that I make a purple and
then tone it down with a hint of burnt sienna. Again I’m using my No.8
round brush. Don’t be scared of this colour when you mix it as it does
look very dark. But instantly when you put it on you get your reward,
because this really will bring your buildings to life and give them some
depth.
Just remember when you put it on always keep your shadow to the same
side, this may sound like a silly statement but when you do big areas of
shadow like this followed by little bits and pieces here and there it's
easy to lose your way and put a piece of shadow in at only one side.
I've
got some fairly strong shadows in this and it's amazing the amount of
darkness that is put in makes the castle light.
Look at how the castle
is now flooding with light because of the darkness we have put in the
extreme left.
|
|
And now it's time for some grasses here and there, and for
this I am using yellow ochre to start with and I’m just blocking in here
and there. Remember being watercolours you have to get your lights in
first.
Once I’ve put these bits of yellow ochre here and there I am now
dropping in, whilst the yellow ochre is still wet, a mix of Hooker's green
and yellow ochre. You will see what a difference that makes to the
castle as soon as it gets land beneath it. Now for some Hooker's green
and burnt sienna, drop in a few touches in amongst the other greens. For
all this I am still using my No.8 round brush. By putting this darker
green in basically all I am doing is indicating the lighter areas.
|
|
|
|
That’s most of my grassy areas almost done. But just here and there on
the bits directly below the castle, I’m going to add some of my shadow
colour again so that I can finish those off before going to the beach. I
stipulate putting the shadow on the bits under the castle because
obviously I can't put the shadow on the grasses that are going to join
the beach until I’ve got the beach in.
|
|
And so now it's time for the beach and I’ve got two different coloured
beaches in this scene. I have a nice light sand directly below the sand
dunes, but then as the sand gets damp further towards the foreground, I
have a darker sand. So first of all I’m using the Charles Evans sand
colour on it's own, just with water. It's so easy to do a beach using this
colour, literally just bash it on and there’s your beach. You really
don’t have to think about any pre mixing. I have literally just blocked
it all in with my ¾" Sapphire wash brush. There you go the first part
of your beach done. |
|
|
|
Now it's time for the bits of the beach that are damp, so slightly
darker. For this I am mixing a little bit of yellow ochre into my sand
colour. Literally block in again making sure that I am taking one colour
of the beach into another slightly here and there so it's not too much of
a hard edge. Now into that little bit of puddle that we have in the
foreground, I want to take my sand colour into that slightly to represent
little bits of sand in the water.
Whilst in with this yellow ochre and sand mix, once the initial wash is
dried, I am just tapping on with the same colour which will appear darker
for a few bits and pieces here and there. And there that’s my beach
almost done with a few easy strokes because of the readymade sand
colour.
Now it's time to get a few little bits of shadow here and there where the
sand dunes meet the beach. For this again I am using my shadow colour
and my No.8 round brush. Also at this stage I am going to darken my
foreground puddle here and there using my ¾" wash brush and again
the Charles Evans Mediterranean sea colour, just tap on with the darker
version of the same colour leaving the under colour showing through here
and there.
Finally, a little bit of shadow on the beach, again stroking over very
quickly and lightly with the shadow colour using my ¾" wash brush
being quick so as not to disturb any of the work that you have put on
underneath. There, beach done. |
|
Now it's time for the people, starting off with ultramarine blue and
burnt sienna. These people are a long way off, don’t start fiddling about
with detail. I am using a No.3 rigger brush to start with, have a few
little black blobs here and there for the heads. Then a touch of
ultramarine blue for one coat followed by a touch of light red for the other
coat. A touch of black for the legs on one of the people, I don’t use
manufactured black, instead make your black, ultramarine blue and burnt
sienna. For the skirt of the other figure a touch of cadmium yellow. For
the other figures a little bit of cadmium red. Now for my flesh tone,
I’ve got a little bit of alizarin crimson mixed with yellow ochre and a
pin head of ultramarine blue. Have a little bit of shadow in these
figures, again using my ultramarine blue and burnt sienna mix. Remember
of course your figures also need a shadow cast onto the beach, so again
that shadow colour. And for the dog, again back to my black mix. |
|
|
|
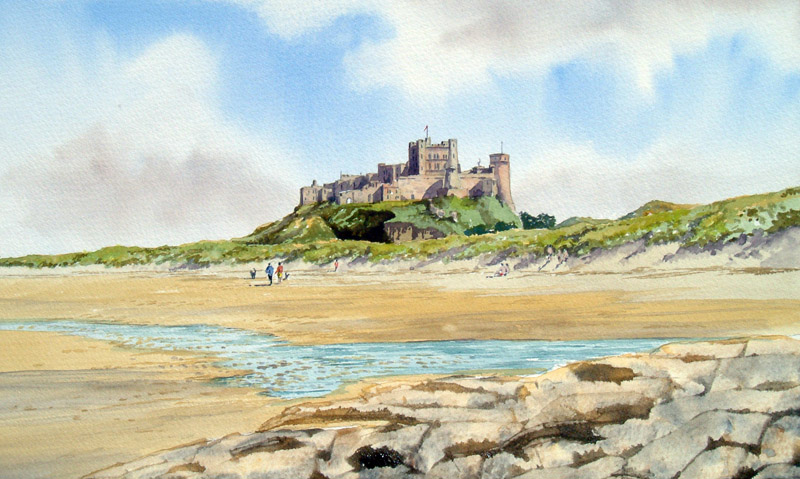
Now for the next stage. I have big clump of rocks in the foreground, but
these are more flat bedded rocks, more like big slabs. So firstly I’m
dropping on a little bit of yellow ochre, well watered, followed by raw
umber again well watered. All just wet and running into each other and
now my black mix, which of course is ultramarine blue and burnt sienna
all one on top of the other. At the moment it all looks like a big soggy
mess, until I get my credit card and scrape over the surface of the
paper dragging the colours together.
This is
what I end up with before I put in a few tiny touches of detail here and
there.
|
In the
tops of the rocks here and there I want a few tints of green. I am
mixing my Hooker's green and burnt sienna and with my ¾" flat wash
brush simply drop in some green.
Now for a few bits of shadow here and there, you’ve guessed it I'm going
to use my shadow colour. With my rigger brush still using the shadow
colour, I’ll have a few cracks here and there.
These rocks are a good frame at the base of the picture, good and strong
without going too crazy into detail. And there we go a lovely summer's day
on Bamburgh beach. |
|