|
|
Off we go straight
into the sky and it looks a right mess to start with. Using a big
No.18 wash brush I daubed on first of all titanium white in about the
bottom two-thirds of the sky area, then cobalt blue mixed with titanium
white in the top third and coming down into the white slightly. After a
good slosh out of my brush, I then put a few touches of Naple's yellow
into the top of the white areas and then permanent magenta mixed with
Payne's grey into the bottom areas of the white. It looks a right mess.
Now it's time for the magic, put away your brushes and with an old bar
towel or tea towel, drag in your blue from the top ragging the colours
together. Then roll the white upwards into the blue areas to create a
nice soft cloud. For the purple colour in the base, simply dab this
upwards into the white areas creating a nice warm cloud shadow.
|
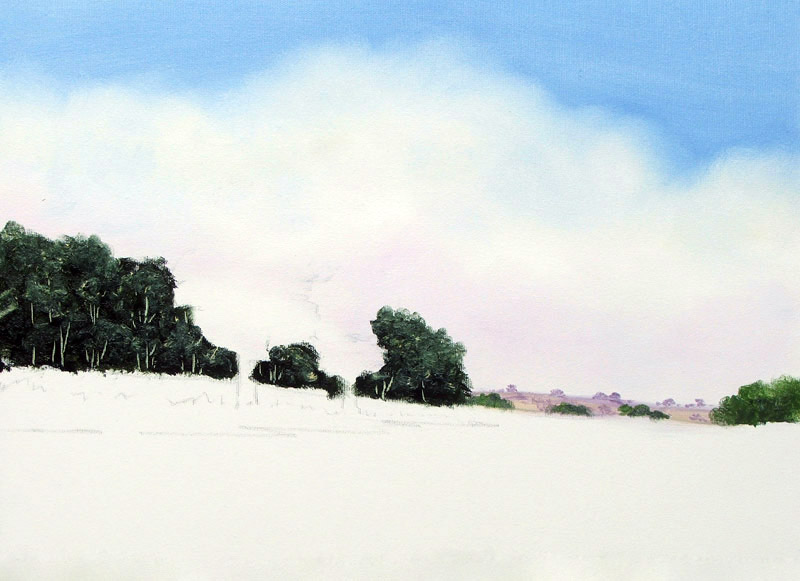
Stage 2 is into the
distance areas, with a mixture of cobalt blue permanent magenta and a
tiny touch of titanium white. Using my No.10 filbert, block in the
distance, using the same brush and using a little bit of Naple's yellow
here and there, then change to my No.4 round brush and do a few lumps
and bumps and lines coming down to give the effect of distant trees and
field lines. Not so difficult so far, is it?
I must tell you at this
point that there can be lots of confusion about what to put into your oil
paints. There are lots of various oils and substances to get the paint
onto the canvas and of course you could use the paint neat straight
onto the canvas, but it would take about 6 years to dry. I use low
odour thinners so there is absolutely no smell, therefore no headaches. I
also use oil painting medium which is a golden thick gloopy liquid, this
has got oils mixed together making it a lot easier as you only have two pots
on the go. The painting medium also gives it a little bit of glaze and
this combined with the thinners also helps it dry a little bit quicker,
so a quick dip of my brush into each as I mix my colours. |
|
|
|
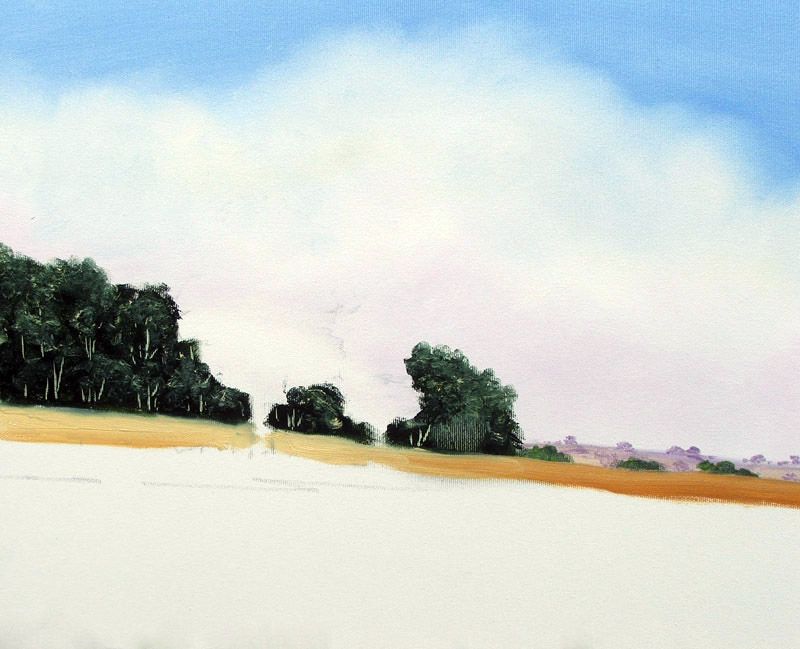
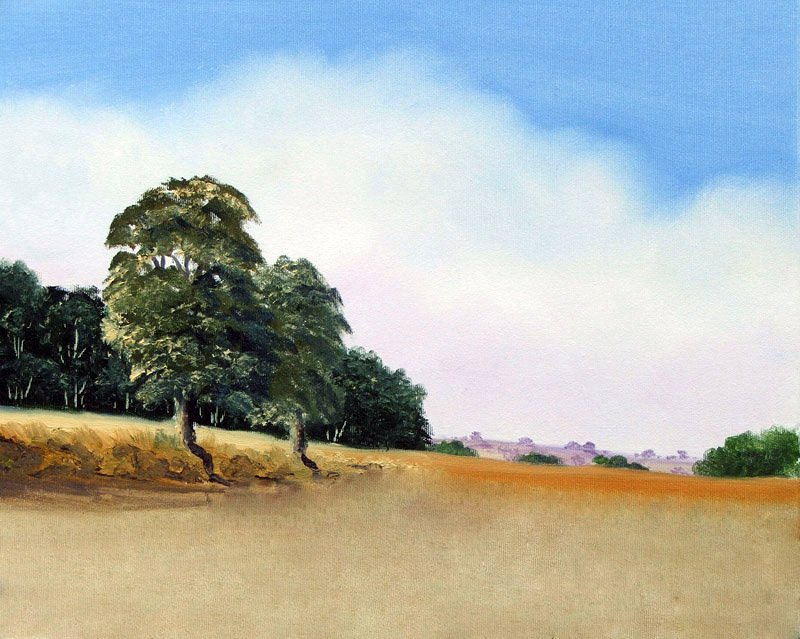
Now it's time for
those big chunky trees in the middle distance. I have a mixture of
Hooker's green, burnt sienna and cobalt blue. With the side of my No.12
filbert simply daub and tap this on and because I am using the side of
the brush, rather than the sharp edge, it gives a nice fuzzy tree effect
on the top of the trees. Next is a mixture of cobalt blue and Payne's
grey that’s going into the bottom of this clump of trees, keeping it
nice and dark. Finally, a good slosh out of the brush add some very
strong Naple's yellow here and there from the top coming downwards.
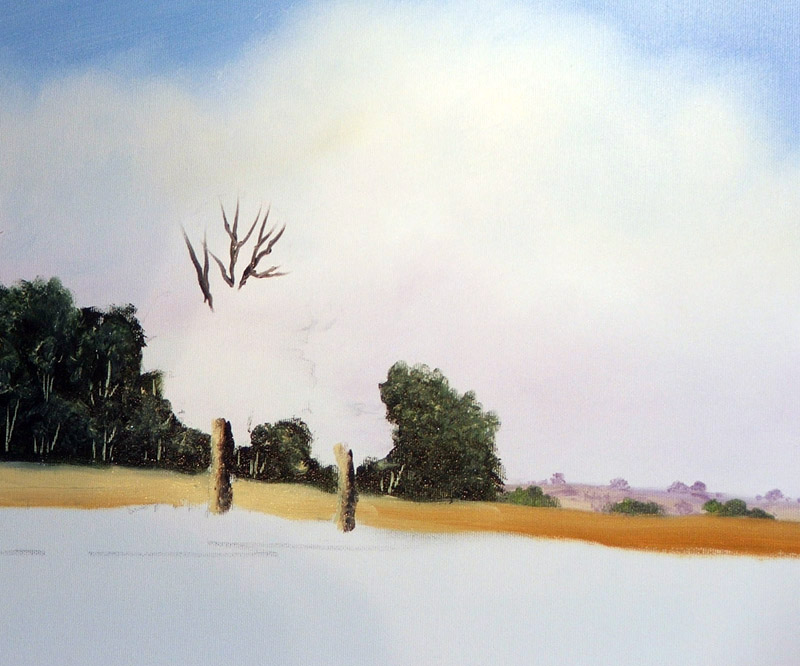
You
will see that I wear rubber gloves when I'm painting, that’s because I’m
always getting into my paintings with my hands. Oils are a lot more
difficult to get from under your finger nails than watercolours. It was
said, that Turner had the dirtiest hands in history, that’s because he
was always in his paintings as well, but of course in those days they
didn’t have marigolds. Add some of that Naple's yellow, get your finger in
and squash some of those lumps, moving the yellow around here and there.
This gives you instant light on the clump of trees, and now with my
finger nail, inside the glove of course, scratch out a few tree trunks
here and there. |
Using my No.10
filbert have a broad band of Naple's yellow coming underneath those
trees, and then as it goes past the end of the trees, add a tiny touch
of raw sienna to my Naple's yellow to make this a slightly richer colour
and take it all the way underneath the middle distance bushy bits to the
right, which incidentally were done with a mix of Hooker's green and raw
sienna.
|
|
|
|
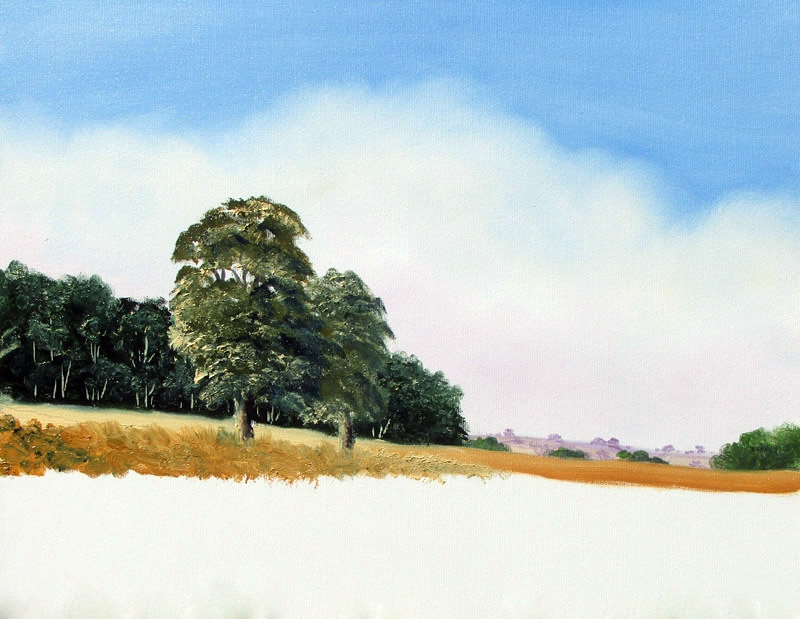
For the big
trees in the foreground I started off doing the tree trunks using my
No.4 round brush firstly with Naple's yellow to the left, then raw umber
in the middle section and then a mixture of Payne's grey and raw umber,
to the right. I have got all of the colours in there but it looks flat
so get the fingers in there again and daub on with my finger merging the
colours together slightly. This gives a rounded effect to the tree
trunks. That last mix of Payne's grey and raw umber is now used along
with my rigger brush to create a few boughs in the top part of the tree,
this gives me the option of leaving a few gaps in the foliage but still
seeing some trees though those gaps. |
|
For the foliage
I applied this with my No.10 filbert using a mixture of Hooker's green
and raw sienna and daubing on with the side of my brush as in much the
same way as the big stuff in the middle distance. Again on the
right-hand side of the trees a mixture of Payne's grey and cobalt blue, don’t
go mad with this colour. Then up the left-hand side and into the main
parts of the foliage itself, good and strong, Naple's yellow. Notice the
tree behind has been made slightly weaker but not as much detail. The
next stage is the rough stuff underneath the trees, again with my No.10
filbert a little bit of Naple's yellow and raw sienna mixed and quickly
whap this on with a few flicks at the top to give the indication of
rough grass and also give it a hint of green by adding a little bit of
Hooker's green into my raw sienna. Tap on with your finger now and merge
it in a little bit.
|
|
|
|
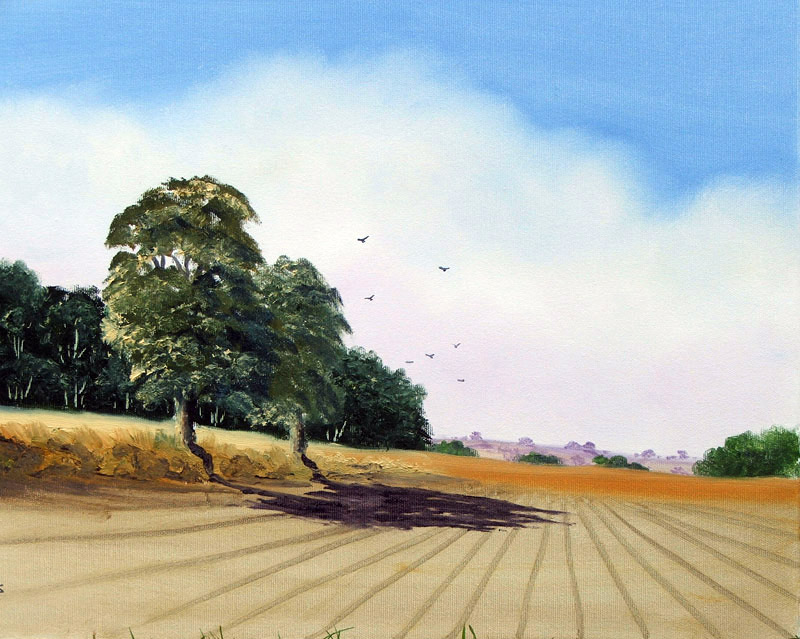
The big bit in the
foreground is a big scary area. Using my No.12 filbert and a mixture of
raw sienna and raw umber, simply fill it in with big broad brush
strokes. It doesn’t matter in which direction the brush goes. Brush
strokes showing don’t count when you are going to rag it all together
with a cloth. This makes it all lie flat horizontally. Now I’ve
got a big area filled in there, that has no recession. That’s created
again with my No.10 filbert and raw umber and drag a few lines out but
notice they get narrower as they go further into the distance heading
towards the centre of the picture. |
Final stage is the
scary shadow. I have got a mixture of Payne's grey, cobalt blue and
permanent magenta, this is strong at the base of the trees and dragged
out horizontally into the fields. A little bit of this into the rough
grass in the base of the trees, then with my finger stroke this into the
field as well. Hey Presto BIG PICTURE.
At this stage I would like to
thank Sue Varian for being on location with me and taking all of the
photographs.
|
|