|
|
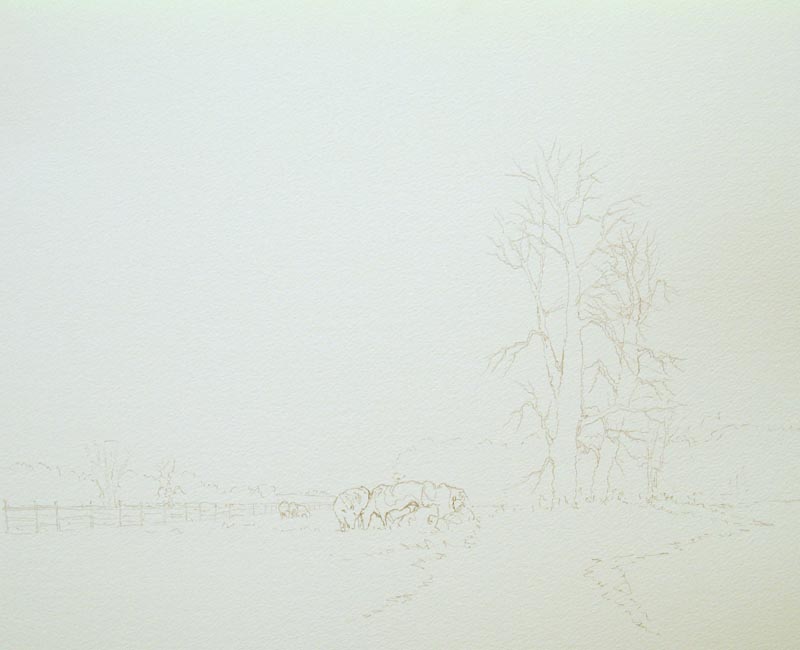
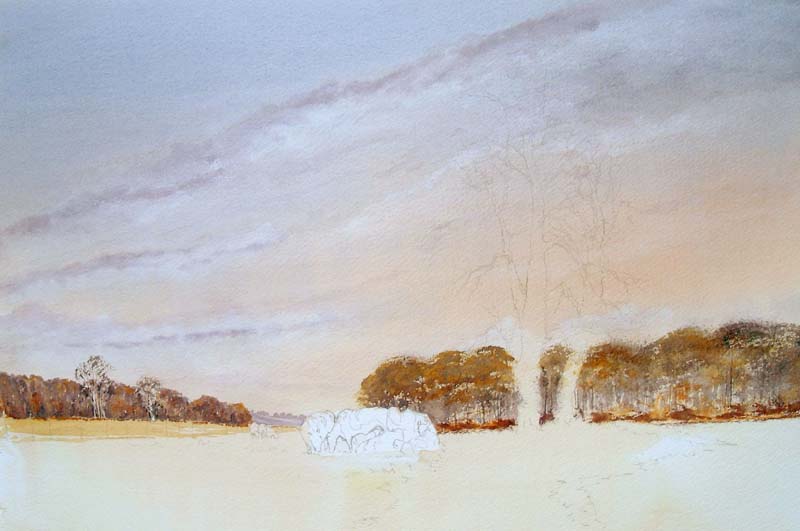
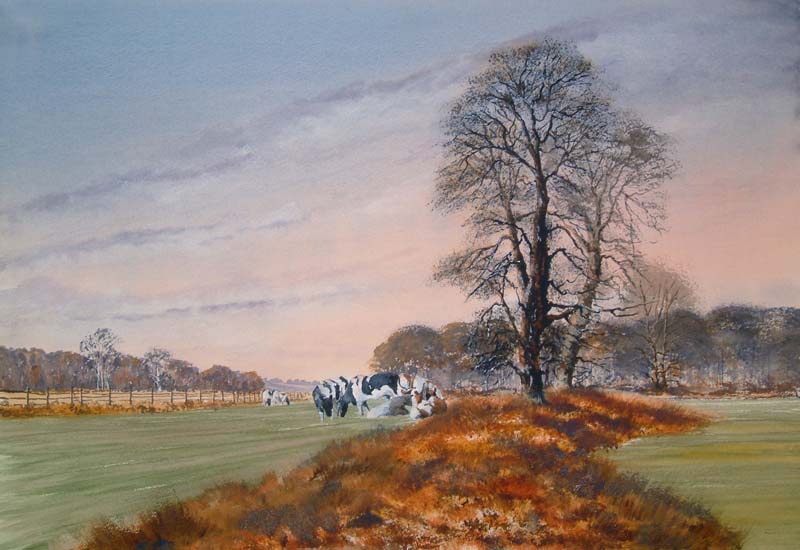
As you can see from the outline drawing on this painting I have gone
into quite a bit of detail especially with the trees. It has to be said
when it comes to painting, there is going to be a hell of a lot more
detail in the trees. I have stuck to the main trunks and boughs of the
trees without drawing every single twig, because remember if you have
thousands of pencil lines for twigs now, you have to try and stick to
them when following the drawing with your paint brush. So keep the
pencil marks down to as little as you can get away with. The cows as the
main group are drawn as cows. The small group over to the left-hand
side, however, in the distance, are merely blobs. But eventually,
hopefully the eye will tell you that they are cows.
|
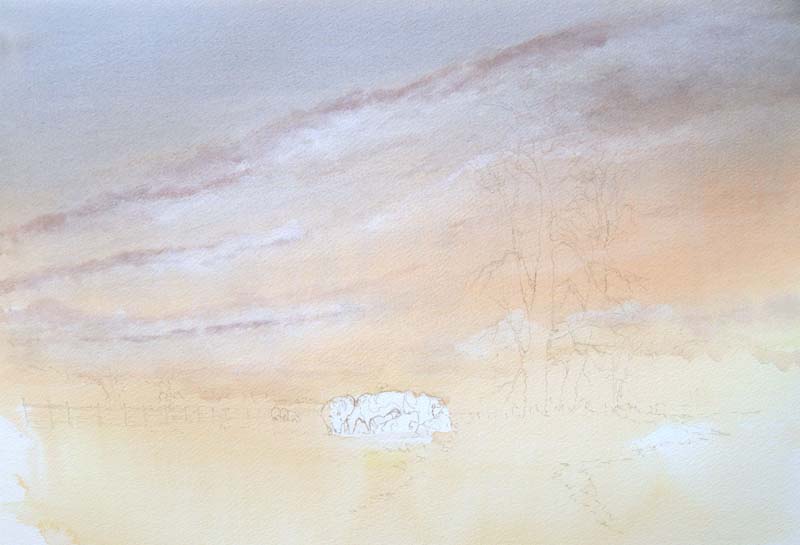
For the sky wash I
have put loads and loads of water onto the paper, which is incidentally
a very heavy weight paper, it's Saunders Waterford 300lb or 600gms. I’ve
done the sky a little bit differently; once I've added loads of water I
have then gone on with very loose washes of raw sienna. Notice, however,
this is coming down into the ground as well, then drop some light red
into this, here and there, and from the top coming down cobalt blue with
light red mixed in. For the lighter cloud areas I simply washed out my
1.5" wash brush, which is what I put the paint on with, and then sucked
some paint out.
Once this initial sky had dried, I used a mixture of cobalt blue,
alizarin crimson and a tiny touch of burnt sienna to put some darker
areas in, especially near the lighter areas that I had already washed
out. All of this was done in watercolour.
|
|
|
|
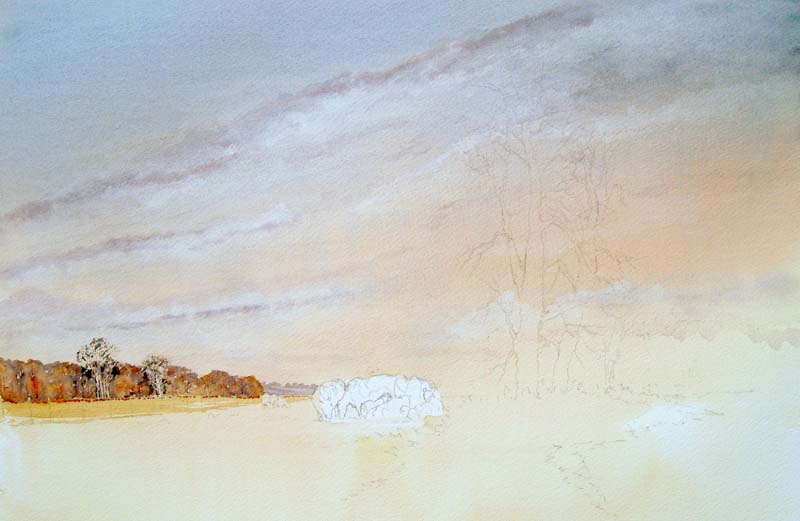
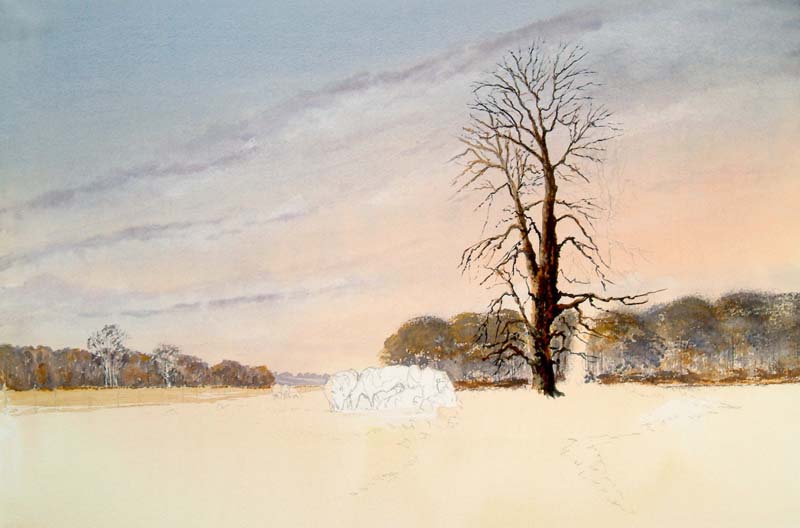
Now again in the far distance, I have my
mixture of cobalt blue and alizarin crimson with a tiny touch of burnt
sienna, still with watercolour and using my No.8 round brush, which is
part of the Sapphire range that I use. Coming slightly further forward
to the large clump of trees in the middle distance I am using the same
mixture with a touch more burnt sienna into the mix, still using my No.8
round brush and still with watercolour. I'm taking care to leave some of
the under colour sky wash showing through here and there, and adding on
top of this mix for the middle distance trees, a tiny touch of raw
sienna here and there. Then underneath a quick stroke of raw sienna
using my ¾" Sapphire wash brush. I’m now turning to my rigger with a mix
of cobalt blue and raw sienna for a few more prominent trees in front of
that woodland. Again all still in watercolour.
|
Now for the big clump of woodland over on
the right-hand side. For this again I’m using mixtures of cobalt blue
and light red with touches of raw sienna here and there, in a very wet
style stippling on with my ¾" wash brush which I’ve split and reinstate
some areas here and there in the top parts of the trees, using the same
¾" split wash brush. Now using a more of a dry brush stroke, stipple on
with the split brush so individual hairs hit the paper here and there.
And again with my rigger brush using mixtures of cobalt blue and light
red, and cobalt blue and burnt sienna, pull out some tree trunks.
|
|
|
|
Now it's time for some acrylics. The
beauty of the acrylics is that I can go into the detail of my tree by
painting light on top of dark just like oils. So I’m starting off and
I’m using my No.3 rigger brush for all of this, with burnt umber and
literally just watering down my acrylics like I would my watercolours.
Filling in the whole thing with raw umber first, then going over the top
here and there with raw sienna lightened with titanium white, pulling
out a few lighter bits. Now I’m adding Payne's grey to my burnt umber to
go in with some darker areas predominantly to the right-hand side of the
tree, but bits and pieces here and there still using my No.3 rigger. |
|
I’m using Payne's
grey and burnt umber mixed simply because I don’t like using ready-made
black in any medium, therefore the Payne's grey and burnt umber mix is
giving me a fairly convincing black.
|
|
|
|
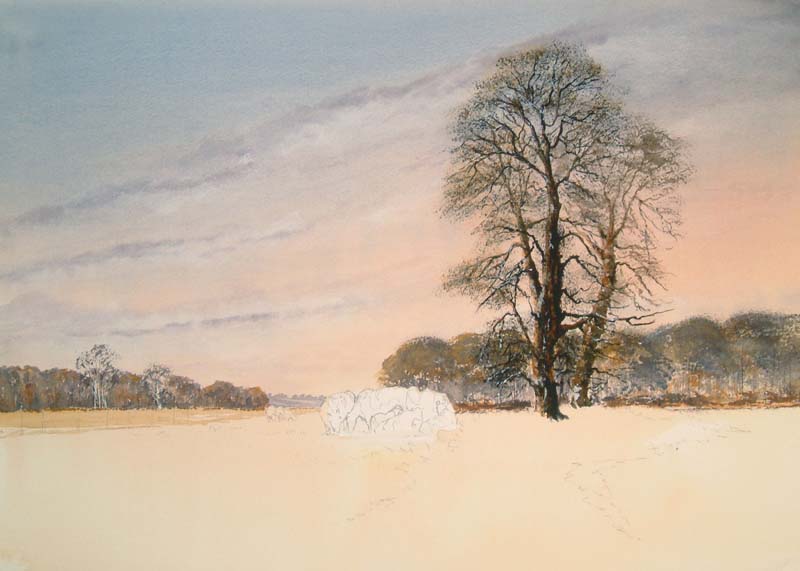
The other beauty about acrylics, if I now
paint in the trees behind using a well watered mix of my burnt umber and
raw sienna, I can go straight in with my light colour and here and
there, where I want it to, it's going to show on top of the dark. So
using my rigger brush, again without anywhere near as much precision and
detail as the last tree, block in the further away tree.
Again when it comes to Payne's grey,
I’m making it much weaker with the addition of more water than the first
tree. Whilst my acrylic is still wet from the first wash quickly draw
the Payne's grey mix on top, predominantly again to the right.
|
This time I’m going to warm up a few areas
here and there on the main tree trunk with burnt sienna and a few
touches of titanium white. At this stage I take the opportunity to add a
few touches of white into the foreground tree, just correcting colours
here and there as I go. Remember white is a very powerful colour and
very effective here and there, just don’t overcook it.
For all of these roughing up effects on the trees, I’m doing the same
process as I did in the distant woodland with my split ¾" wash brush.
|
|
|
|
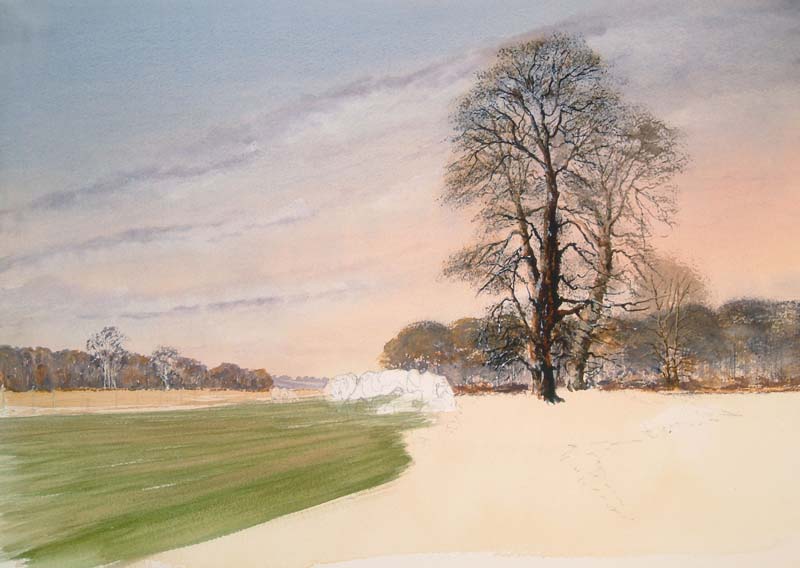
For the trees in the distance I have used
a mixture of raw sienna, titanium white on top of my burnt umber and
titanium white, but obviously there is hardly any detail in this.
Now back to a little bit of watercolour and I’m using a mixture of
Hooker's green and raw sienna. With my ¾" wash brush, drop in a little
bit of this muted green in the foreground field near the cows.
Add on top of this here and there, a
few touches of light red to darken down a little bit; this is also the
general sky colour, into the landscape. On the field edge still with
watercolour, I’m using my ¾" wash brush with a mixture of burnt sienna
and yellow ochre and painting a little bit of rough edges, not so much a
hedge as rough grasses. While this is still wet fill in the fence posts.
I'm doing this while it's still wet so that the base of the fence posts
soften in to the rough grasses underneath. |
|
Now it's time for the cows. For these I’m
using my No.8 round brush, and obviously back to acrylics. What I’m
doing is making my black mix, again add a few blocks of black on the
cows. At this stage I have the option of leaving white areas because
I’ve left my white paper showing through all of those, but instead I’m
going to paint it with titanium white. Again just block some white next
to the black. Now a few touches of lighter black, for this I'm adding a
tiny bit of titanium white to my black mix so that I have more tone in
the black for the shape of the body. For the shadow colours white in
shadow is a bluey-white, so a touch of cobalt blue into my titanium
white will give me some shadow colour.
The cows in the far distance are literally
just blobs, white and black. Now with my watercolours and my ¾" wash
brush a little bit of Hooker's green, yellow ochre and a tiny touch of
light red will give me a slightly duller green for the right-hand side
of the field making sure that the colour gets lighter as it gets further
away.
Now on top of here, drop a few touches
of fairly strong yellow ochre.
|
|
|
|
Now for the foreground heavy growth stuff in
acrylics, I’m going in with raw sienna to start with and my ¾" wash
brush, I’m simply flicking up here and there, whacking colour on. Now
add a little bit of white to that raw sienna to make it lighter for the
further away bit of the rough grasses, still flicking here and there. A
few of these flicks getting heavier on the white and thicker with the
paint as they come further forward.
|
|
Now time for some burnt sienna and raw
sienna mixed for this foreground stuff, then a few touches of cobalt
blue mixed with burnt sienna and literally just squiggling on with my
big wash brush to create some rough growth. Once I have finished this, I
realise that my green fields either side needed toning down to sit in
with the colour of the rough growth, so I’m very simply glazing over
with a very weak mix of raw sienna and burnt sienna acrylic and my 3/4"
wash brush very light, very weak. Let this all dry before the finishing
strokes of shadow. |
|
|
|
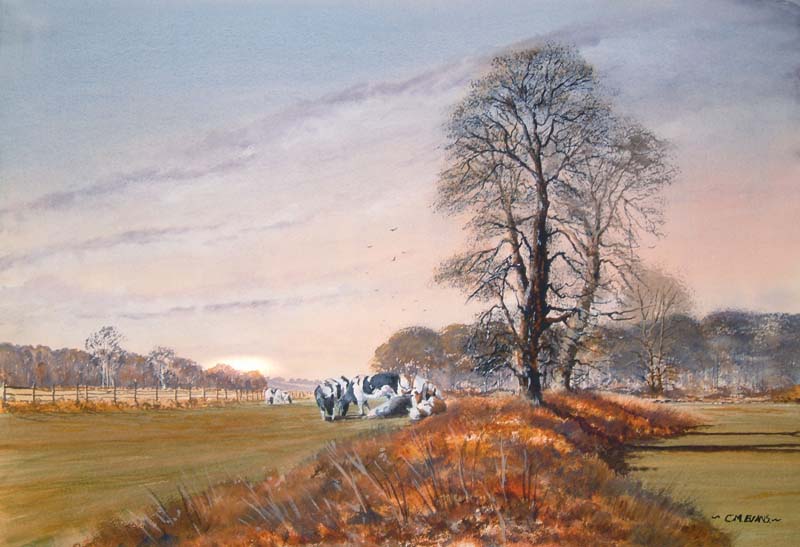
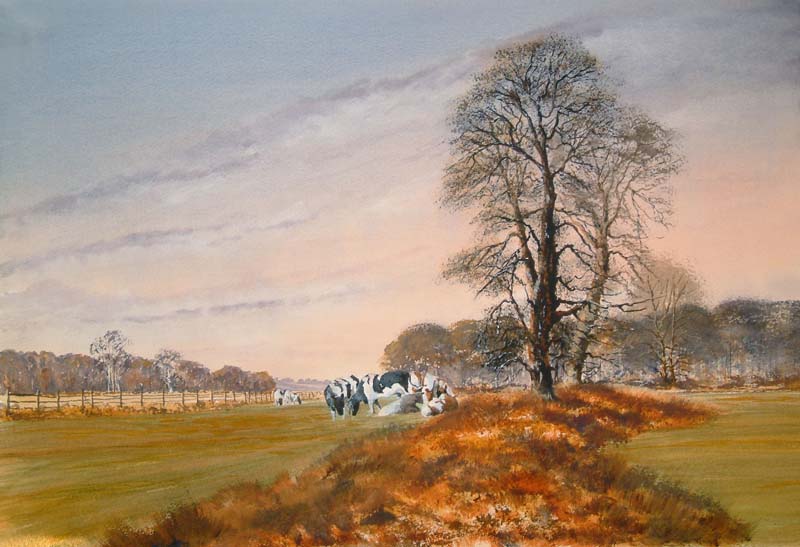
For the shadows I'm using a mixture of
permanent magenta with my Payne's grey; this although very dark is not
too cold. Think of the light coming from the left, which is why I put
the light on the left of the trees, casting shadows over to the right.
There we go, finished project.
|