 |
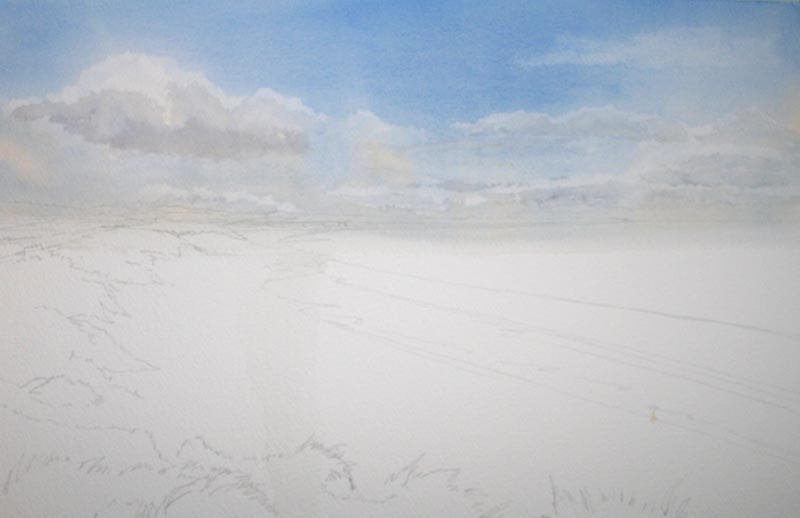
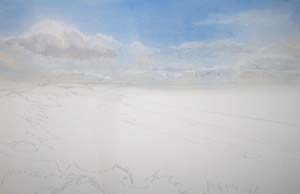
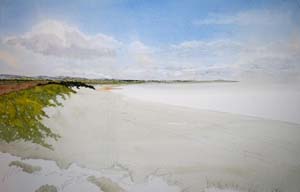
Step 1 :
As you can see
fro the first image, I have started off with a very simply outline and
then put in my sky wash.
|
Step 2 :
For the sky wash I used a 1.5" Dalon brush, which is a totally
synthetic brush but is very big so will carry a lot of water.
I have very simply pre wet the entire sky area and flooded this whole
area with cobalt blue. Then wash our my brush, squeeze out surplice
water and with a damp brush, suck out my clouds. Now putting the tiniest
touch of alizarin crimson into my cobalt blue, drop in some warm cloud
shadows. There we are a fairly big impressive sky. |
|
 |
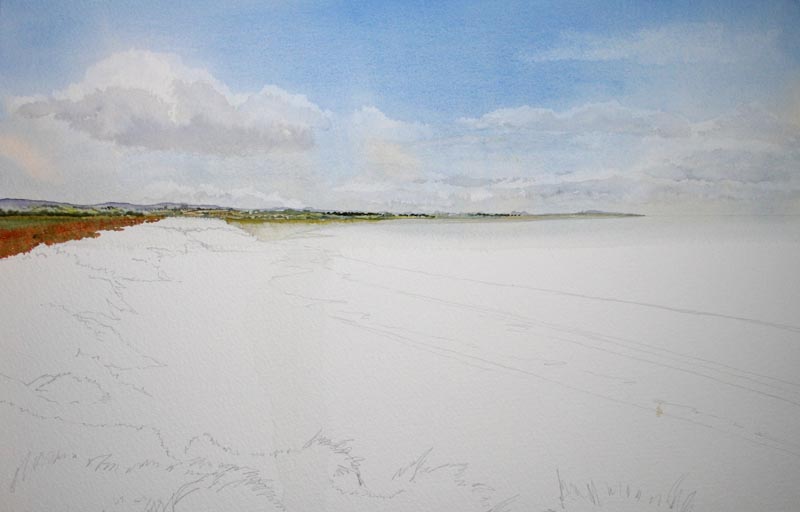
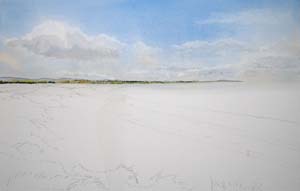
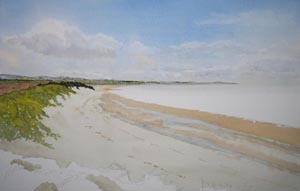
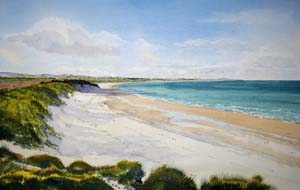
Step 3 :
This view of
Druridge Bay is a fairly unusual one as so far as I took my viewpoint
from the edge of the dunes looking slightly inland as well as just
concentrating on the sea, in doing so I got a view of the cheviots in
the distance., Now I have changed my brush to the No 8 round Sapphire
and as with the clouds a mixture of cobalt blue and alizarin crimson,
fill in the distant hills.
Coming slightly further
forward from that purple colour but still using the same brush, I have
done some slightly further forward hills and fields using firstly yellow
ochre, then yellow ochre and hookers green mixed, lots of water in both,
then hookers green and burnt sienna mixed and then a few touches of
burnt sienna here and there on its own, again plenty of water, but the
burnt sienna will just warm up areas here and there.
By doing all this in the distance I have given the impression of some
woodland and field lines but I haven’t painted a single tree, just a few
blobs and lumps here and there will give the impression of bushes and
hedge lines, this is what I used the hookers green and burnt sienna for.
|
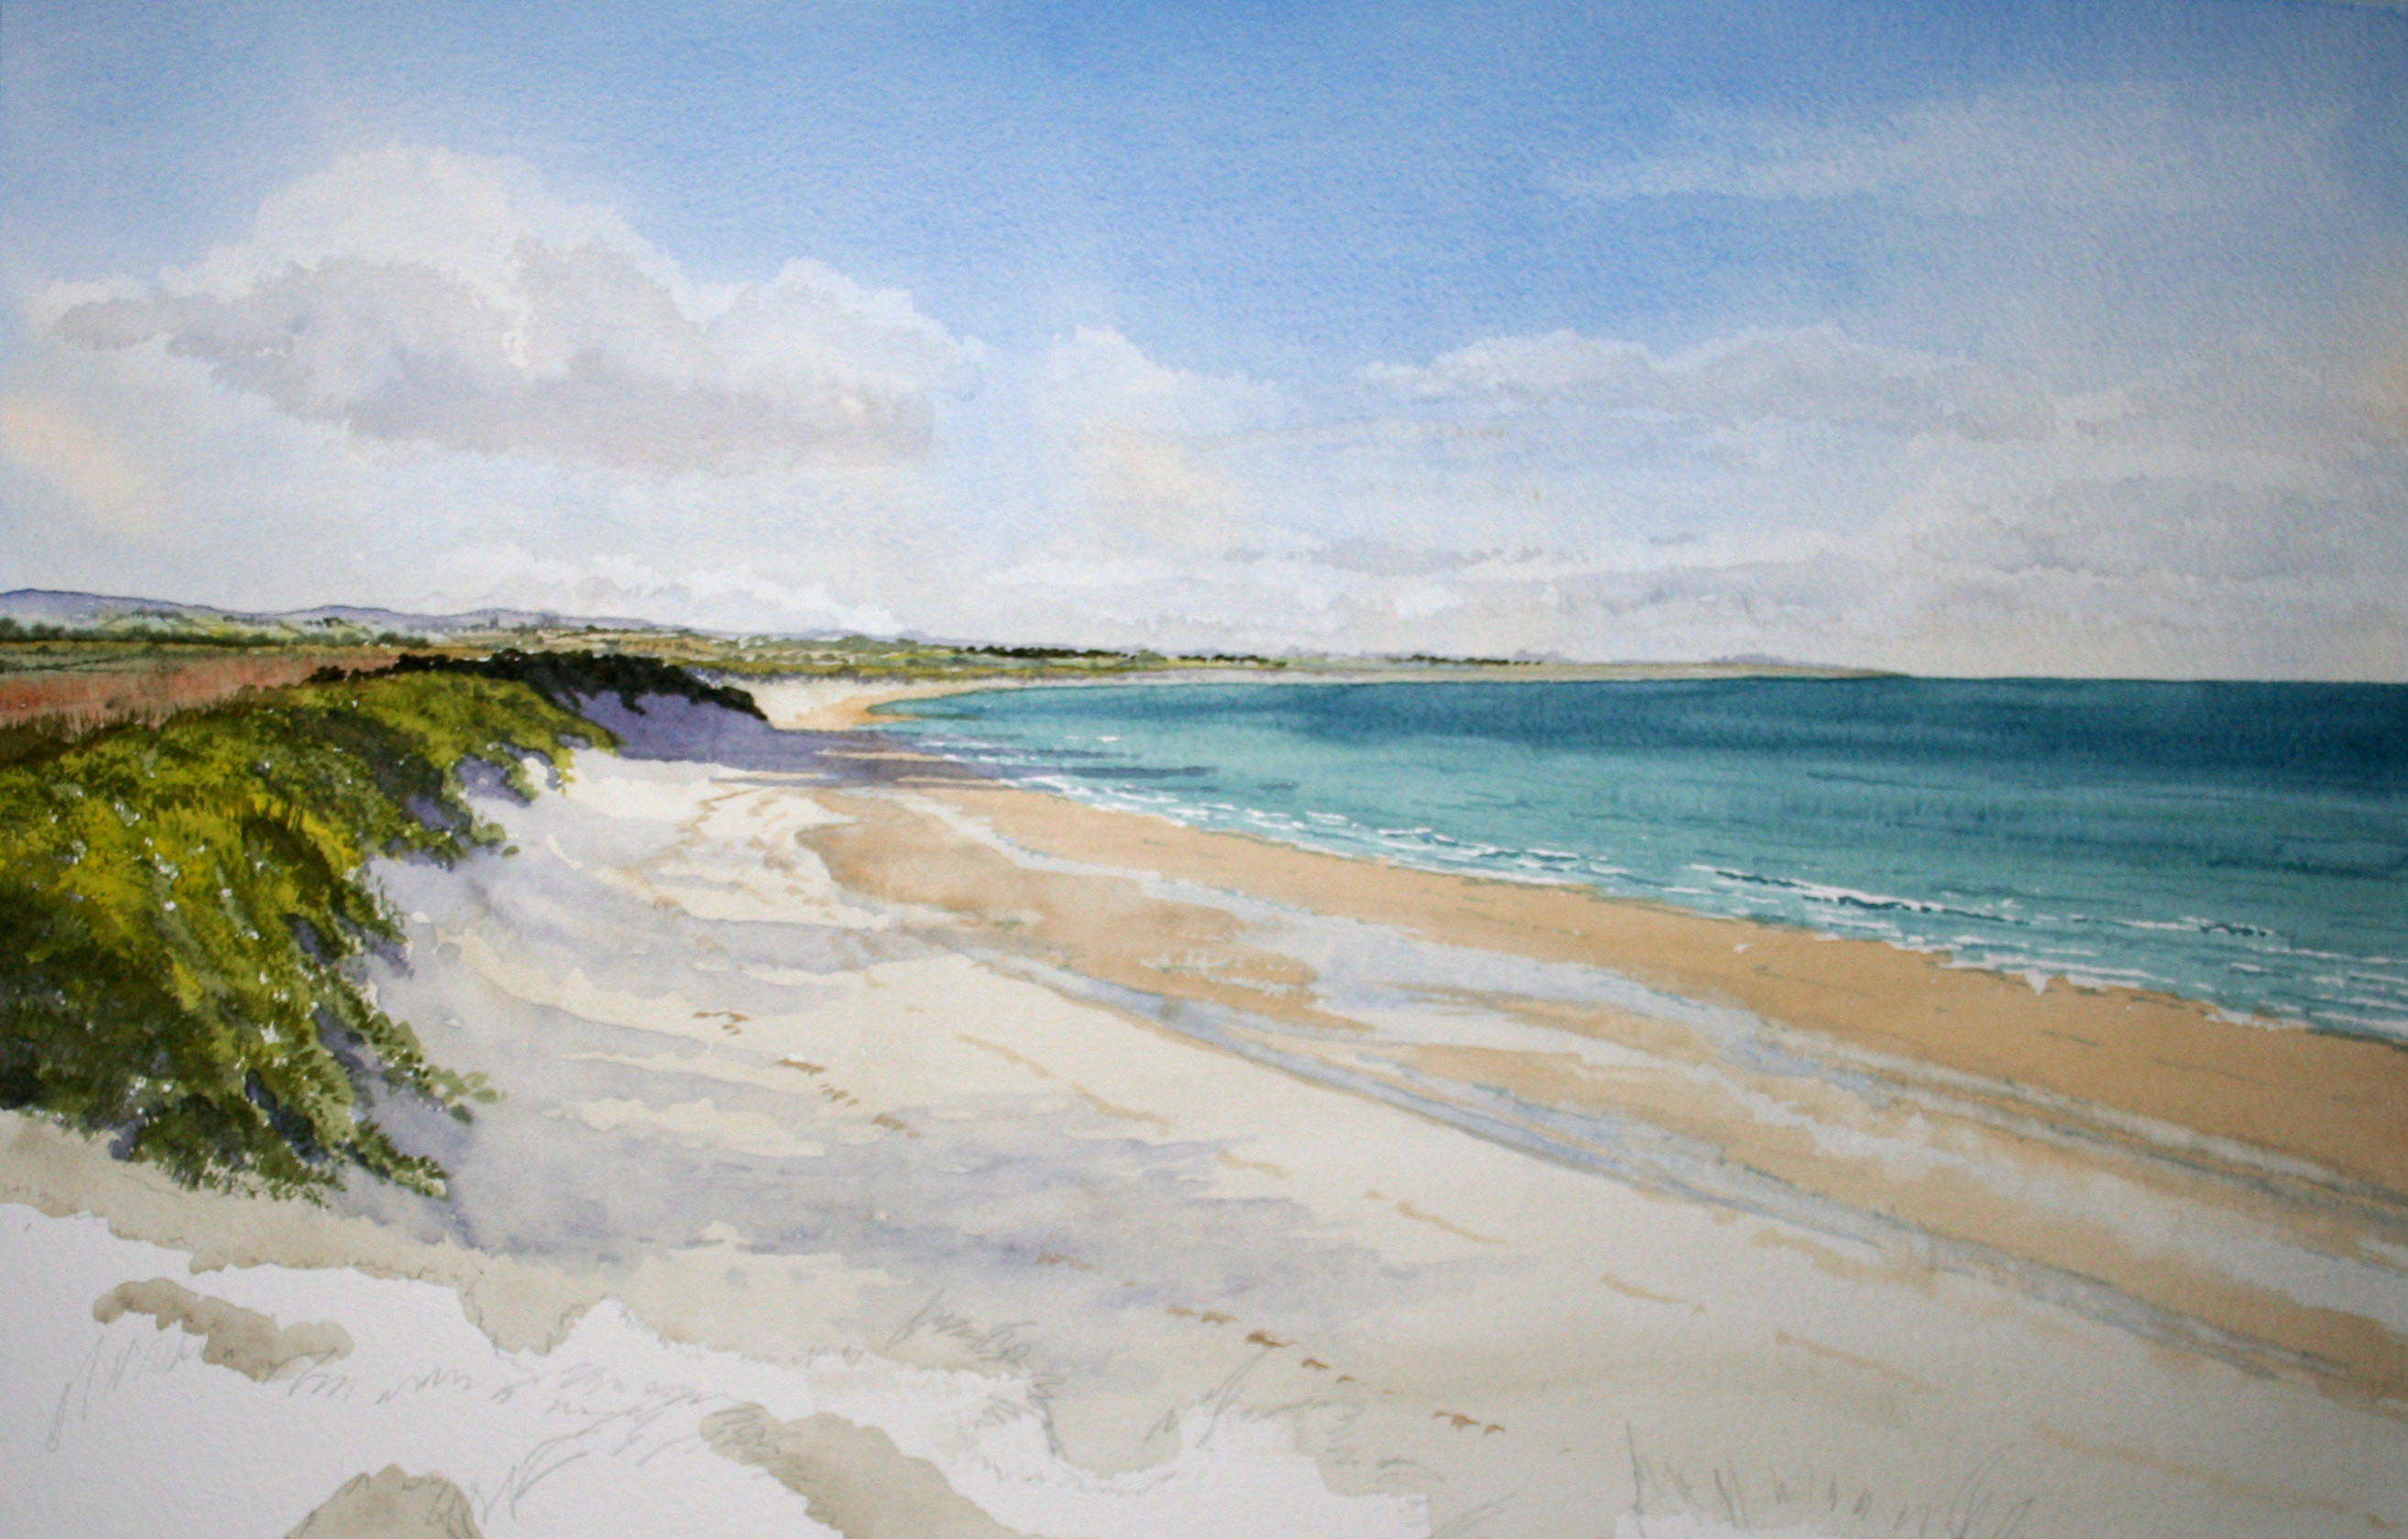
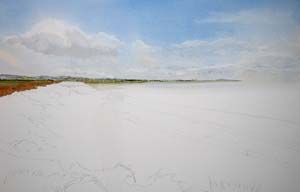
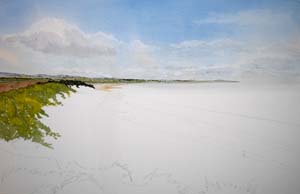
Step 4 :
Coming further
forward on the left, for that gorsy kind of a field, which for the
un-initiated is a field of gorse. For this I have used yellow ochre and
burnt sienna mixed and the tiniest hint of yellow ochre and hookers
green mixed just here and there, but it is just the tiniest hint, I
don’t want green to take over here. You’ll notice that on the far
distant beech area over to the right, I have just filled this in again
with my No 8 round brush with some Charles Evans Sand colour well
watered down, keep this very week, it’s a long way off.
Back to the little bit of beech that I referred to earlier, I have now added a
tiny touch of light red well watered this just warms it up a little bit.
For the dunes I started off with yellow ochre and using my ¾"
sapphire wash brush get my light bits in first. Then a mixture of
hookers green and yellow ochre followed by hookers green and burnt
sienna. Get your greens in first and then flick upwards slightly with
the big brush to give the impression of grasses. Notice that clump in
the middle distance is much darker, this is to capture my shadow later
on. |
 |
 |
Step 5 :
The whole of the beech area
is just blocked in using my ¾" wash brush and the Charles Evans Sand
colour. All done good and wet. The sand of course is not just useful for
painting beaches, but in fact beaches is the least I use it for. It’s a
really good lightening for mixing with other colours to lighten then,
much better than using white paint. Also mix it with a tiny touch of raw
umber and you have got a fabulous stone colour.
|
Step 6 :
Once the beech area is dry, I then washed over here and there with a touch
of light red and then a little bit of well watered Charles Evans British
Sea colour. A few squiggly lines here and there using raw umber and my
No 8 round brush just to give a bit more recession, you will
notice these squiggly lines get narrower as they go further away.
|
 |
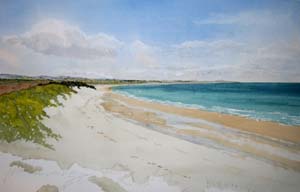 |
Step 7 :
For the sea,
there are 2 Charles Evans Sea Colours, British Sea and Mediterranean
Sea. In this picture I have used them both mixed. Normally you should
only use the Med Sea when using cobalt blue for the sky because the Med
Sea is based on cobalt blue, likewise the British sea is based on Ultra
Marine Blue, in other words, never use cobalt blue for your sky and
British Sea for your water. As you are mixing your blues in the same
picture, this wont look right.
Notice in the sea there is a darker colour in the distance, just add a
little bit more Med sea as I go further away, also notice I have left a
few white squiggly bits in the foreground areas to denote some waves.
|
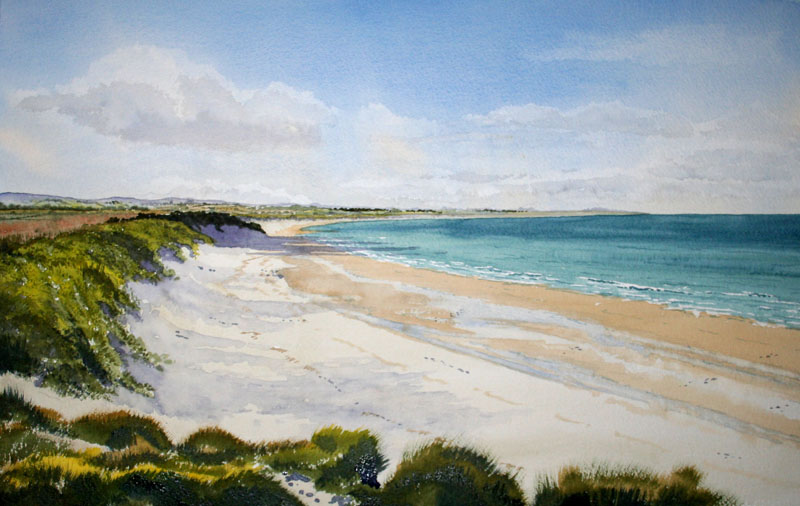
Step 8 :
Now its time to give the whole thing a little bit more life with the
addition of some shadow, for this I have used cobalt blue, alizarin
crimson and burnt sienna. Using my ¾" wash brush, just lightly block
in some areas coming down from the dunes. But that bit in the middle
distance is good and strong. This adds a whole new depth to the
painting.
|
 |
 |
Step 9 :
For the grass
areas in the foreground I have used exactly the same technique as in the
rest of the sand dunes and the same colours. Just make everything
stronger then flick the grasses up taller and heavier. |
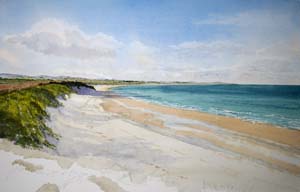
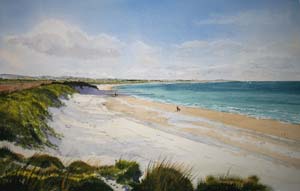
Step 10 :
The final image I’ve added a
little bit of life. Those boats in the distance are actually 3 little
stokes of very strong sand colour and a little bit of blue to one side
to give a bit of shadow and make the light stand out more. For my people
well really you could use any colour you want for their clothing just do
the head as a blob of black and the legs are again a stroke of black,
but they are just blobs. Don’t start fiddling about with life drawing. A
little bit of life with the stroke of my brush and there we go my
impression of my own beautiful beech. |
 |