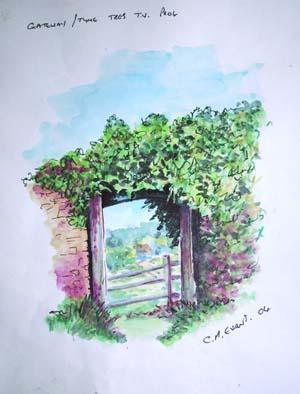
 |
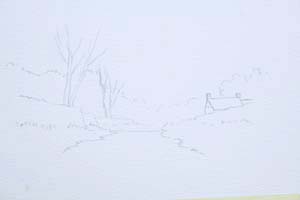
Step 3 :
Now into the hookers green behind
the house I have put some ultra marine blue.
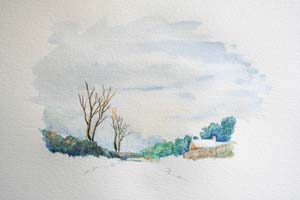
There comes a stage in every watercolour pencil drawing or painting when
its going to look a bit of a mess, a bit like a kids drawing with
squiggles all over the place, but when you add the water that’s when the
magic happens, so now its time for the sky wash. I never scribble onto
my sky area and hopefully get rid of all the hard lines with the water.
Because afterwards it’s a bit late and all those lines haven’t gone and
your sky is ruined. So instead do it this all I am doing is taking the
colour off my pencil with my ¾” wash brush, the stroke straight on to
the painting;
I am starting off with a little bit of raw sienna followed by ultra
marine blue, followed by a few touches of indigo here and there.
And just like any other watercolour painting suck out a few clouds here
and there with my damp brush.
Now just with my damp brush I am wetting the colours of the trees that I
put on earlier. Now also into the greens behind the house. Also as I am
wetting the colours I am spreading and mixing together the blues into
the green softening colour and merging. Making sure that there are only
hard lines where I want there to be hard lines. At this stage it starts
to look like a painting rather than a colour drawing. Now I am going to
let this dry a little bit before again starting with the drawing
process.
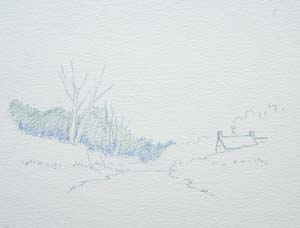
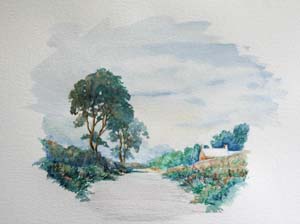
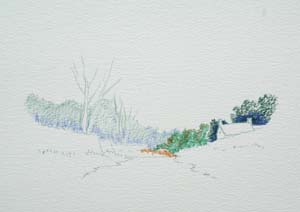
So its time to back in with dry pencil, and I am going to the building
which I am doing with a little bit of raw sienna first for my light and
raw umber for my slightly darker tones. The hedge in front of it, I am
again going to use raw sienna and a touch of light red and then a little
bit of my vivid green. To be honest in watercolour pencils there are so
many names of colours that in workshops using watercolour pencils I
don’t tell pupils specific names all the time its just a light green a
mid green, or a dark green. Because every manufacturer of colours have
names that are specific to them.
For the roof of the building I have touched in very lightly with a
colour called cool grey to ensure that I keep light on the roof but I
didn’t want as glaringly white as leaving white paper. For the hedge on
the left hand side I have used the same colours as the hedge on the
right hand side, but pressed on stronger and harder and out a little bit
of ultra marine blue into the base of the hedge, just like I treated the
trees behind the house.
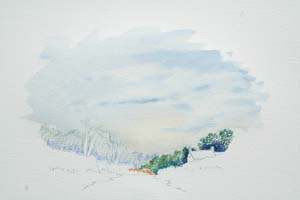
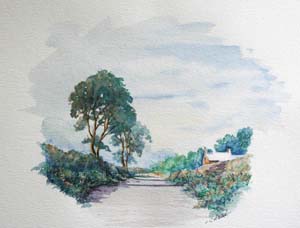
As you will see from this image, it looks all very scratchy and jumbled.
Now its time once again to turn it into paint.
You will notice that I am building up very strong colours on the left
hand side, this is because on this picture I want the light coming from
the left, so this hedge is going to be in shadow.
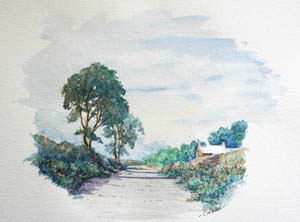
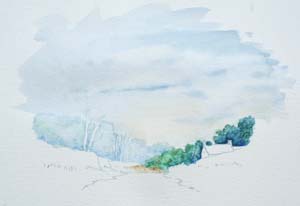
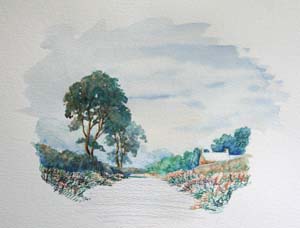
Now its time for those big chunky trees in the foreground.
I am starting off with a little bit of yellow ochre to the left hand
side of my trunks and bows. I’m pressing on fairly hard to get a
stronger colour. I am now adding a little bit of Vandyke brown and again
press on fairly hard. The temptation at this stage is to leave these
trees as dry pencil because they are actually starting to look quite
nice as they are. But I want a softer approach to this picture. Finally
just here and there in the trees, I am going on with a little bit of
black in this case the colour is called mars black. But black by any
other name. I don’t want to fiddle about with too many twigs and stuff
because obviously be the look of the rest of the picture these are going
to be in full foliage. The foliage I’m not going to draw in, I am going
to paint straight on by taking the colour straight off the pencil with
my wet brush. But before that lets wet these trees.
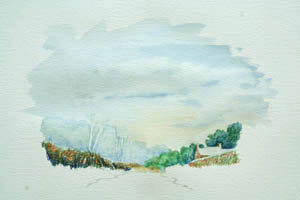
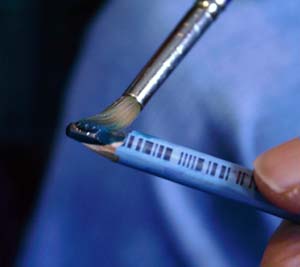
For the wetting process of the trees I am using my NO 8 round brush.
These brushes that I have used for the whole of the project are No 8
round and 3/4” flat wash brush, the same brushes that I used for all of
my paintings, be it watercolours, watercolour pencils or acrylics. They
are a mix of sable and synthetic and therefore a very versatile brush.
For my foliage on these, I am not painting on with big strokes, I am
just kind of stippling. For this foliage I have used hookers green
followed by a little bit of indigo and then a few daubs of yellow ochre
here and there dropping one colour into the next.
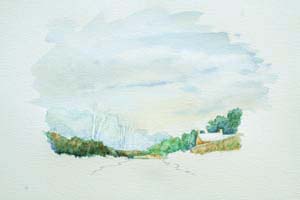
For the roadway or track, I am stroking over very loosely with blue grey
keep this light in colour, gentle little strokes followed by a little
bit of light red now for the grasses either side, I have got mixture of
hookers green, vivid green, yellow ochre and light red, get a few
scribble bits of all these colours. Make a mess!
Notice I have left more of the light colours showing prior to wetting on
the right hand side than on the left. I think we should have a little
bit of indigo in these as well, good and strong.
There do you see what I mean by make a mess.
|