
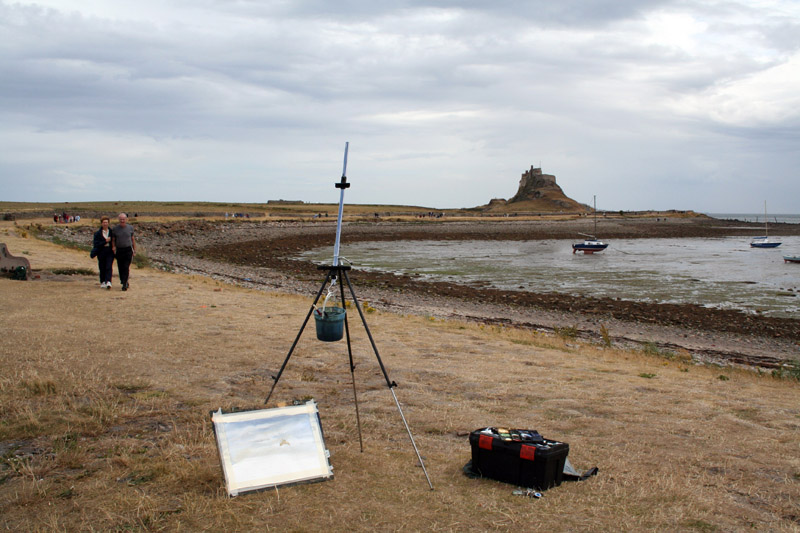
Holy Island
| STAGE BY STAGE | ||||
|
Holy Island
| STAGE BY STAGE | ||||
|
 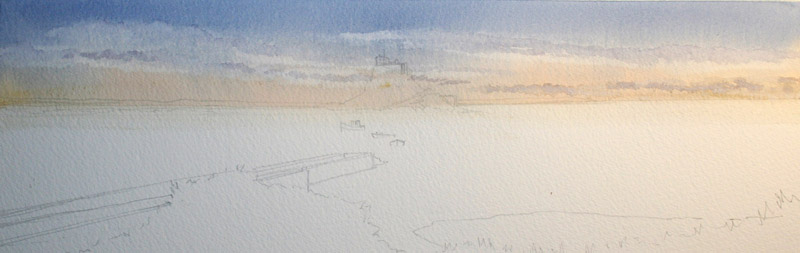 |
Step 1 : |
|
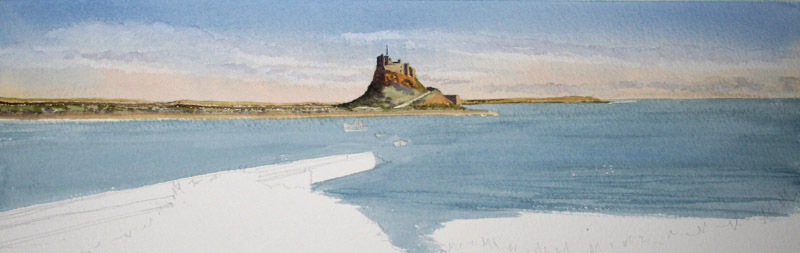
Step 2 : There seems to have been a lot done in this next image, buts its all very simple. Yellow ochre firstly in my castle and hill that its standing on. Then a touch of raw umber whilst the yellow ochre is still wet so that I am keeping my light to the right. In the bottom part of the hill I use a mixture of hookers green and burnt sienna keeping it all very wet and make the colours flood together, whilst this was drying I went to the land behind and either side of the castle and hill. For this I used yellow ochre and hookers green mixed in the distance and then a touch of hookers green and burnt sienna as I come further forward. Notice throughout all this I have left the path going up the hill unpainted. Its just the sky colour showing through. Now that the castle has dried I went in with my shadow mix of ultra marine blue, alizarin crimson and burnt sienna. I kept this predominantly to the left so this makes most of the light to the right. At this stage also using the same colour, stick in a few windows here and there, you don’t need to count them all, remember no one is going to say that cant be Lindsfarne castle because I know its got 16 windows and that one only has 10. |
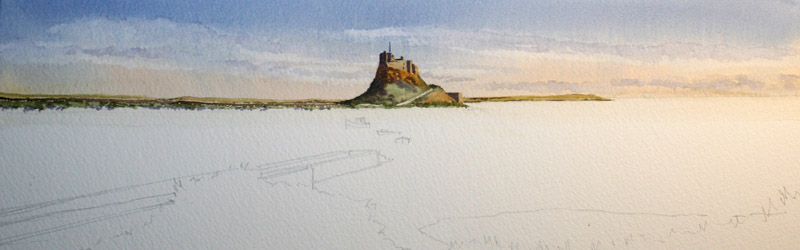 |
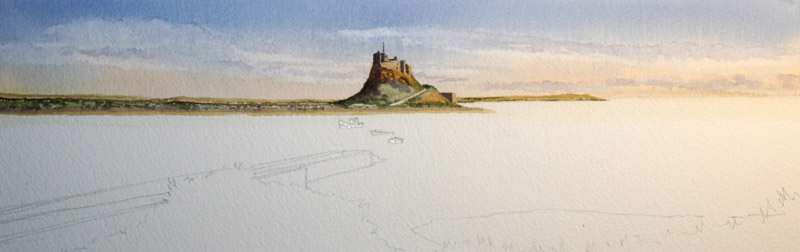 |
Step 3 : At this stage its quite interesting really because I have masked my boats out now using my masking fluid, just touch in where the boats are. I say interesting because often when people are doing anything with masking fluid, they tend to do their drawing, then mask out all the areas you need at the very beginning before you start painting and that masking fluid stays on all the way through to the end of the painting and that’s when you normally get the masking fluid ripping off the top of the paper when you try to take it off, that’s because you’ve left it on too long. Use it as you need it stage by stage throughout the picture, if you are going to use it at all. As soon as that big of the painting has dried get it off straight away. Whilst my masking fluid was drying I have touched in a little bit of beech in the distance and for this I have used Charles Evans Sand with a tiny touch of raw umber into it. |
|
For the sea I have simply blocked in with my British Sea colour with a tiny touch more hookers green mixed into it. Whilst it was still wet washed out my ¾ inch wash brush, sharpened it between my fingers then suck out a few strips of lighter colour here and there. |
 |
 |
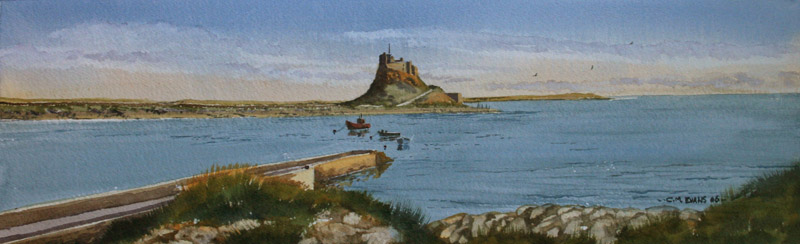
Step 5 : Let this dry before taking off the masking fluid and then colouring the boats. For the boat on the left, I have used light red, for the foreground one I have used cobalt blue and for the middle on I have used cobalt blue and burnt sienna. Then put a few touches of my shadow colour on the right hand side of each boat to give it a light side and dark side. For all of this I used my No 8 round brush. At this stage I also gave a little bit more interest to the water by adding a little bit more of the Charles Evans British sea mix slightly darker and add a few squiggly lines here and there. |
|
Now its time to take advantage of that different view point i.e the pier. For this I firstly washed it in with a mixture of raw umber and burnt sienna, which gives me a burnt umber colour, notice how I have left some lighter areas in the pier, simply less burnt sienna and more water. Whilst the pier was drying I bashed in some rocks using my ¾ inch wash brush simply whack on a bit yellow ochre, then raw umber leaving the raw umber showing through here and there, then black which I make using ultra marine blue and burnt sienna again slap this on leaving the other colours showing through here and there. And then whilst it is all still wet using a credit card (Preferable the Northern Rock Card) scrape out my rocks. For the grasses again using my ¾ inch wash brush, start off with yellow ochre flicking upwards making the grasses fairly strong so don’t put too much water in the mix then hookers green and burnt sienna in the same way but leaving the yellow ochre showing through to the top edges of the grass. Now go back into the pier using a bit of my shadow colour which
is of course ultra marine blue alizarin crimson and touch of burnt
sienna. You can see where I have put this on the pier. |
 |