|
STAGE BY STAGE |
|
Essential
Supplies
The items you will need to complete this scene are as
follows:-
|
 |
|
|
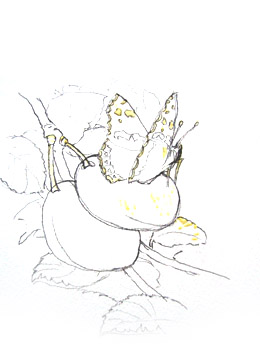
It's at this time of the year, when winter is finally loosening its cold and grey grip, that we painters along with everyone else, start to think of more jollier and colourful scenes. Spring is sprung, and so for this
project I thought I would show you how to paint something which is not as difficult as you would at first
think - a butterfly. Colourful, yet strong in form. As you will see from the first image, I have done a simple outline drawing, without too much detail, but making sure that I have detailed the various patches on the butterfly's wings. Areas which I need to leave white I've touched on, using a small rigger brush and masking fluid.
|
|
|
|
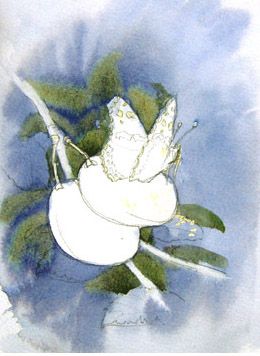
In the next image, once the masking fluid had dried, I dropped in the background areas using a mixture of ultramarine blue and light red. Whilst this was still damp, I gave the impression of a few blurry distant leaf shapes using a mixture of Hooker's green dark and burnt sienna. Notice that once I had dropped in all these colours for the background and whilst the paint was still wet, I simply squeezed out water from the large 3/4" wash brush,
which I had used for all the techniques, and drew out the wet paint along the twigs. |
|
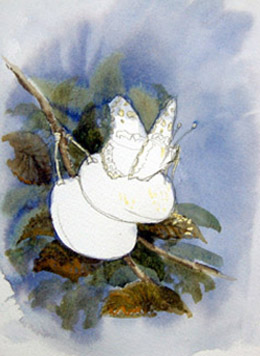
For the next stage, using my No.8 round brush, I filled in the twigs with raw umber, very well watered down. When this was really dry, still using the same brush, I touched in with raw umber and ultramarine blue mixed, giving me a darker brown here and there, but leaving the lighter brown showing through in the places I want to indicate some light. Still using my No.8 round brush and a mixture of Hooker's green and yellow ochre, I filled in the leaves that are to be more pronounced and then touched over with Hooker's green and burnt sienna mixed, to darken the areas of the leaves.
|
|
|
|
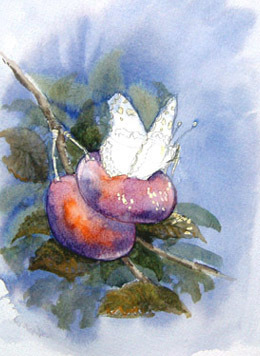
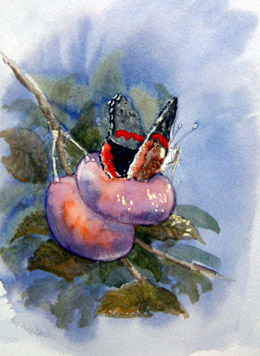
For the next stage it was time to paint the plums. Firstly, I wet one of the plums with clean water and dropped in some well watered cadmium orange. Then using a mixture of ultramarine blue and alizarin crimson, heavy on the crimson, I painted the rest of the shape, leaving touches of the cadmium orange showing through here and there. Whilst these colours were still wet, I squeezed out my No.8 round brush and took out a little paint here and there giving a suggestion of light. Now I darkened my purple colour with a tiny touch more ultramarine blue and added the shadow
colour, primarily around the bottom section of the plums.
|
| Whilst the plums were drying it was time to paint the butterfly. For the big washes on the wings I started off with a mixture of ultramarine blue and burnt sienna. Using my No.8 round brush I simply blocked in. This brush is a very versatile brush because it can do both fairly broad strokes by pushing the brush harder on the paper, or very fine strokes by using the tip or point. Notice for the bottom part of the right-hand wing, I went in with a little more burnt sienna in the mixture. For the red part of the wings I used cadmium red, with a tiny touch of alizarin crimson mixed
in. |
|
|
|
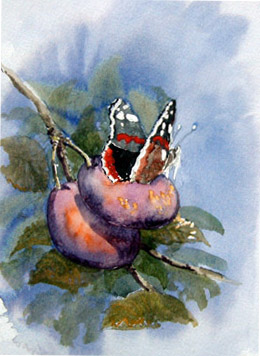
Whilst the main washes on the butterfly were drying, I removed the masking fluid. Using my rigger brush I painted in the areas I had previously masked over. For the stalks of the plums I used a mixture of Hooker's green and yellow ochre. For the few spots on the leaves and the plums, I used just yellow ochre. Now I added a little more shadow into the foliage areas by using a mixture of ultramarine blue and alizarin crimson, with a tiny touch of burnt sienna added into the mixture - this makes a good strong shadow
colour. With my rigger brush I put a few touches here and there to enhance the darker areas. Notice that by putting in plenty of dark here and there, you also make the most of the light.
Now was the time to take the masking fluid from the butterfly - I always find this part quite
exciting. Next the body and detail of the butterfly, and for the body I used my rigger brush and a mixture of burnt sienna and ultramarine blue, but heavy on the burnt sienna. |
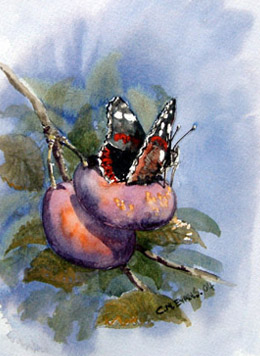
| For the legs I made my ultramarine blue and burnt sienna mix into a black, leaving the odd slither of white paper showing through here and there.
And there it was finished, a bright and warm painting to remind us of the lovely days coming
soon. After the cold weather we are currently experiencing here in the
north of England, the warm weather can't come soon enough!
Enjoy.
Charles 12/3/2004
|
|