|
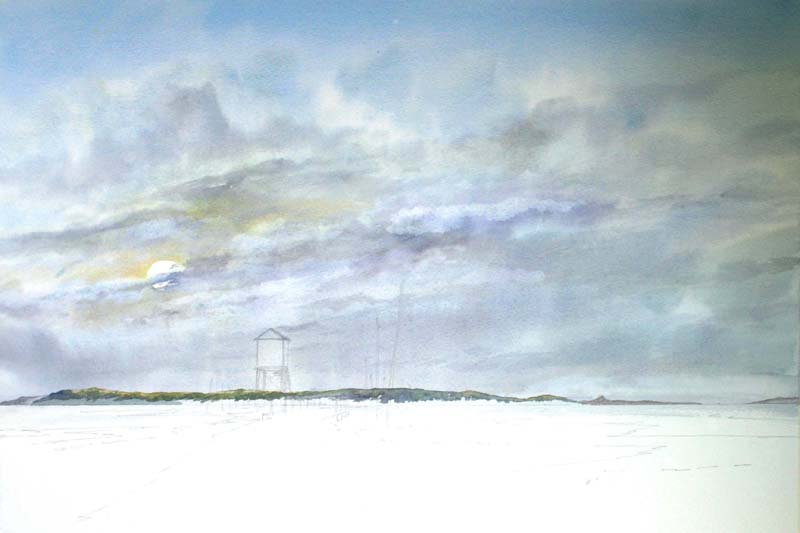
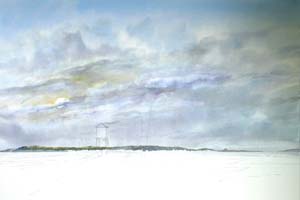
Step 1 :
As you will see in the first image I have done my initial outline
drawing and followed on with a very atmospheric looking sky. This took a
little bit more doing than usual starting off with yellow ochre in the
base and then concentrating a little bit of yellow ochre on that patch
on the left hand side. Then cobalt blue from the top all the way through
into the yellow ochre whilst this was all still wet and running I sucked
out some clouds and then quickly went back into the cloud areas with
cobalt blue and a touch of alizarin crimson mixed to give some shadow to
the clouds. Now again whilst still wet, get a piece of tissue roll it
into a little ball press onto the place where you want your sun or moon
to be and quickly rotate your hand to suck out the paint. Once I had
done this I then painted a little bit of cobalt blue and alizarin
crimson mix across the the white area. And that’s a very complex sky but
again done within about 5 minutes.
For the distance I started off with a little bit of the Charles Evans
sand colour on the base of the sand dune areas followed by hookers green
and yellow ochre here and there, then hookers green and burnt sienna on
to here and there. Notice I have left a little bit of yellow showing
directly below the light area of the sky. Finally for the distance I
mixed my cobalt blue with a touch of light red to put some shadow in
here and there. This is also the mix that I carried on over to the right
to show the castle in the far far distance. |
|
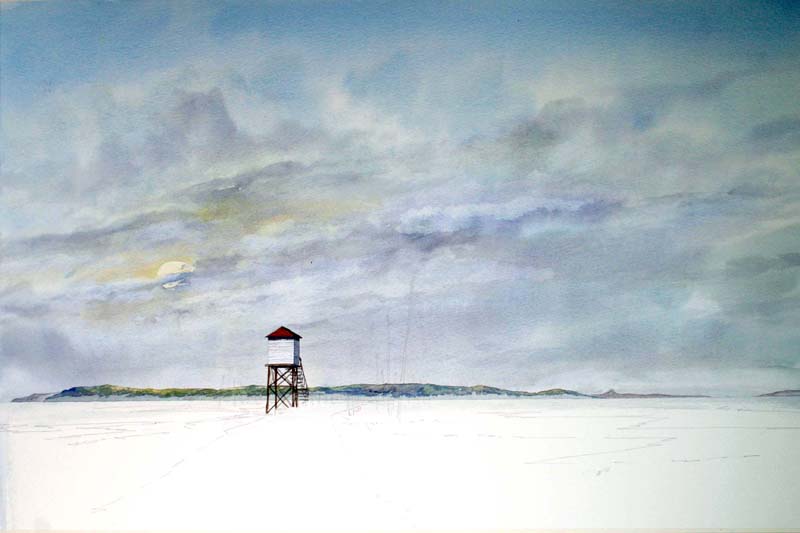
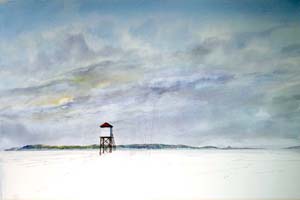
Step 2 :
In the next
image you will see I have painted in the little cabin or rescue tower.
As so many people tent to get stuck over there these days. I simply,
with my ¾” wash brush, washed out the now dried sky in that area,
leaving it white. For the dark side of the main block I used cobalt blue
mixed with light red, for this I used my No 8 round brush. As I did for
the roof which was burnt sienna, apart from the right hand side of the
roof which was burnt sienna with cobalt blue mixed in. For the legs of
the cabin I was still using my no 8 brush and I painted these in with
raw umber mixed with cobalt blue. Notice that as you look through the
legs, the ones that you see further behind are weaker in colour. (Same
mix more water.) |
 |
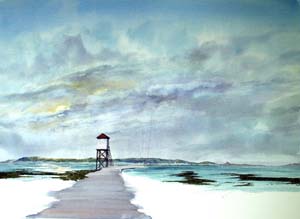 |
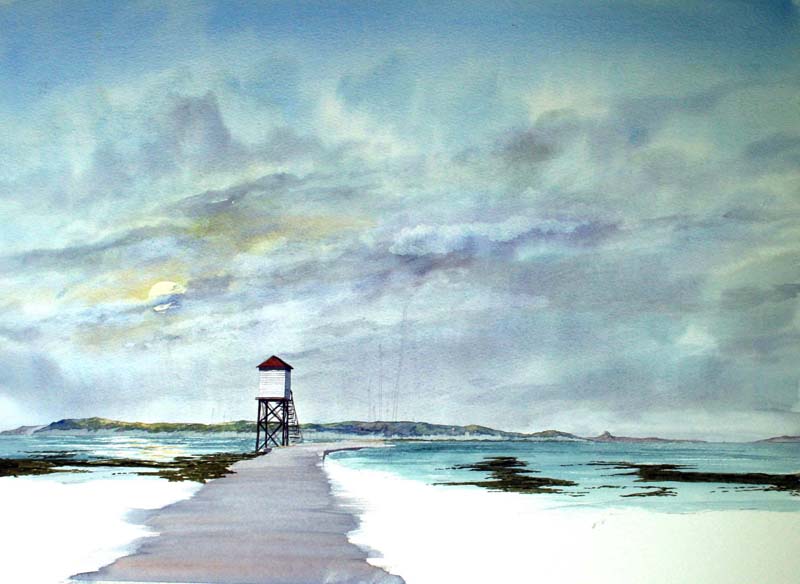
Step 3 :
Time for the
sea now, as most of you are aware, the Charles Evans sand colour comes
in a box of 3 tubes, the other two being British Sea and Mediterranean
Sea, for this particular sea I mixed all of those colours together and I
used my ¾” wash brush and just bash it on but leave white bits showing
here and there especially underneath the light area of the sky which is
over to the left. Once this had dried I started to do those shafts of
marshy type grass that go out into the water. For this again with my ¾”
wash brush a few touches of yellow ochre here and there, then hookers
green and burnt sienna mixed, nice and dark.
For my path, still with my ¾” wash brush, this is a mixture of cobalt
blue and light red. Make sure you brush this in with clear horizontal
strokes otherwise your road wont lie flat. |
|
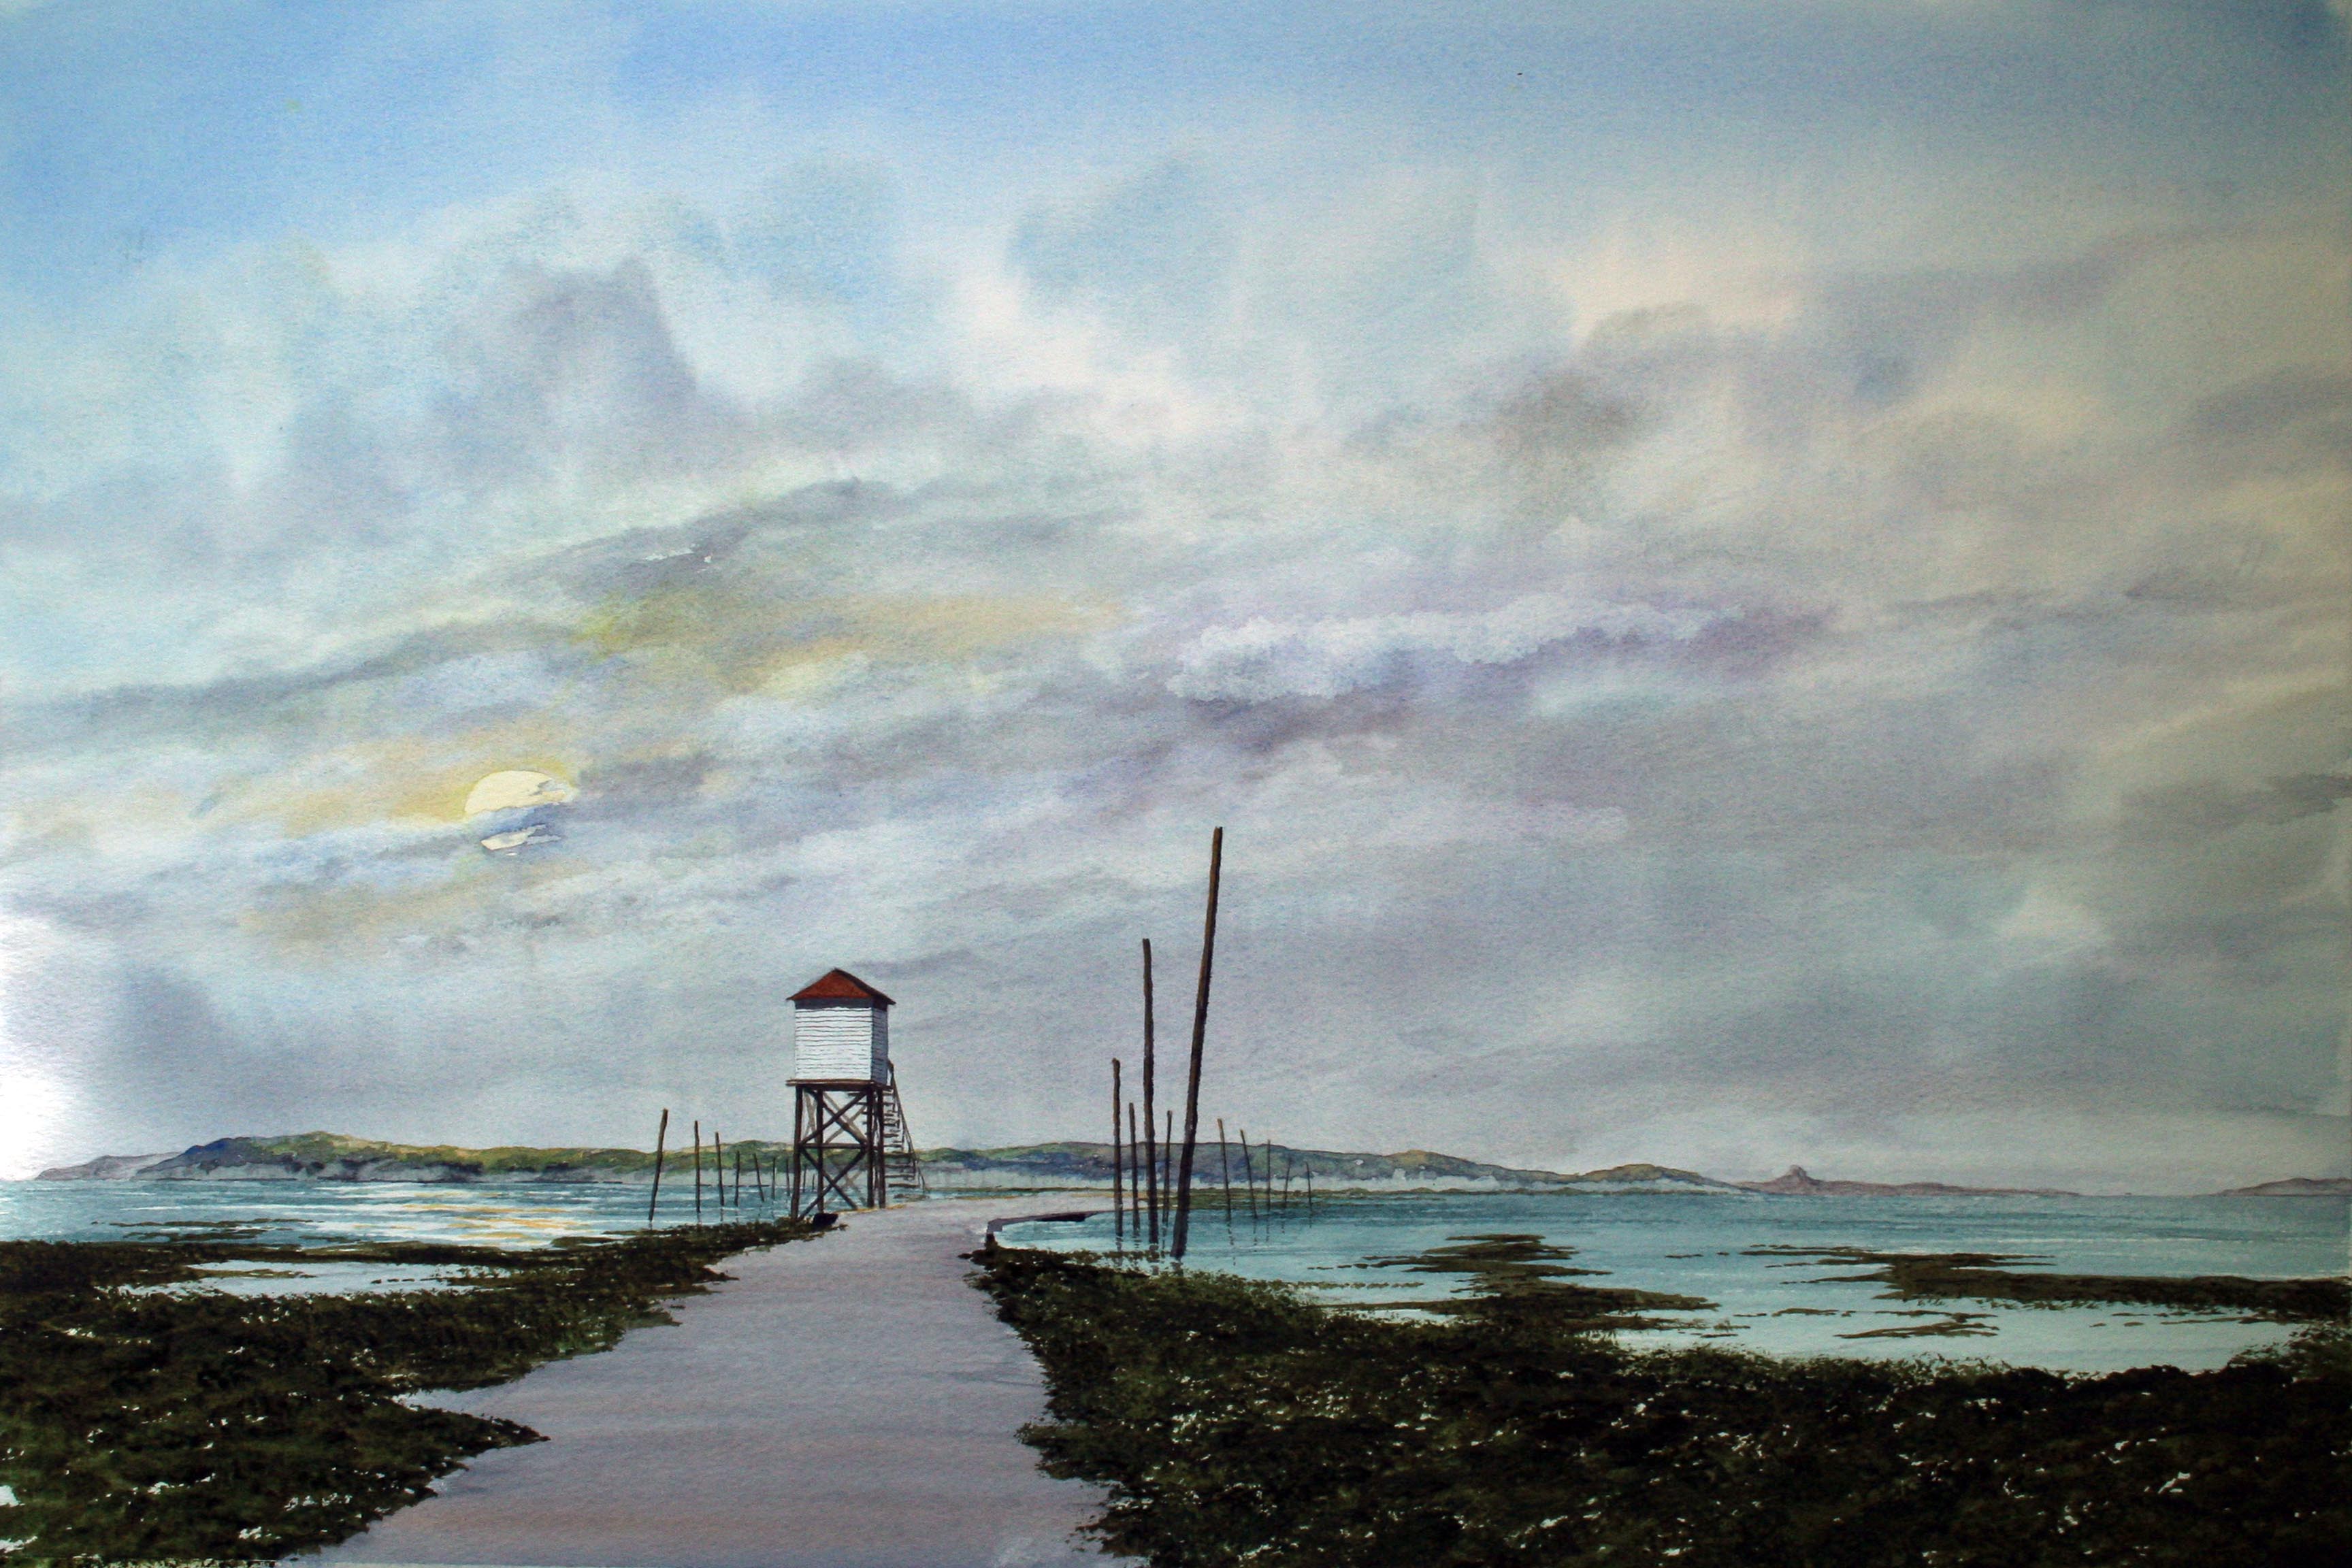
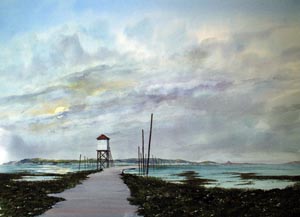
Step 4 :
In the next image it seems like I have done a lot but its mainly big
grass areas in the foreground, these are exactly the same colours as I
used in the last image for the further away stuff, but everything now
has got darker and stronger with less water in it. But once I have
finished putting my grass colours on I then stippled on with my split ¾”
wash brush with a mixture of cobalt blue and light red.
For the posts I used raw umber first, then a mixture of cobalt blue and
burnt sienna down the right hand side of each post for the shadow.
Notice on the larger posts a little touch of yellow ochre here and there
on the top left hand side, don’t forget to paint your reflection in. |
 |
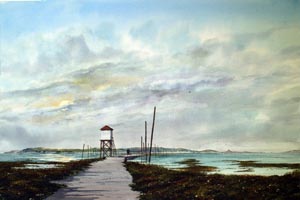 |
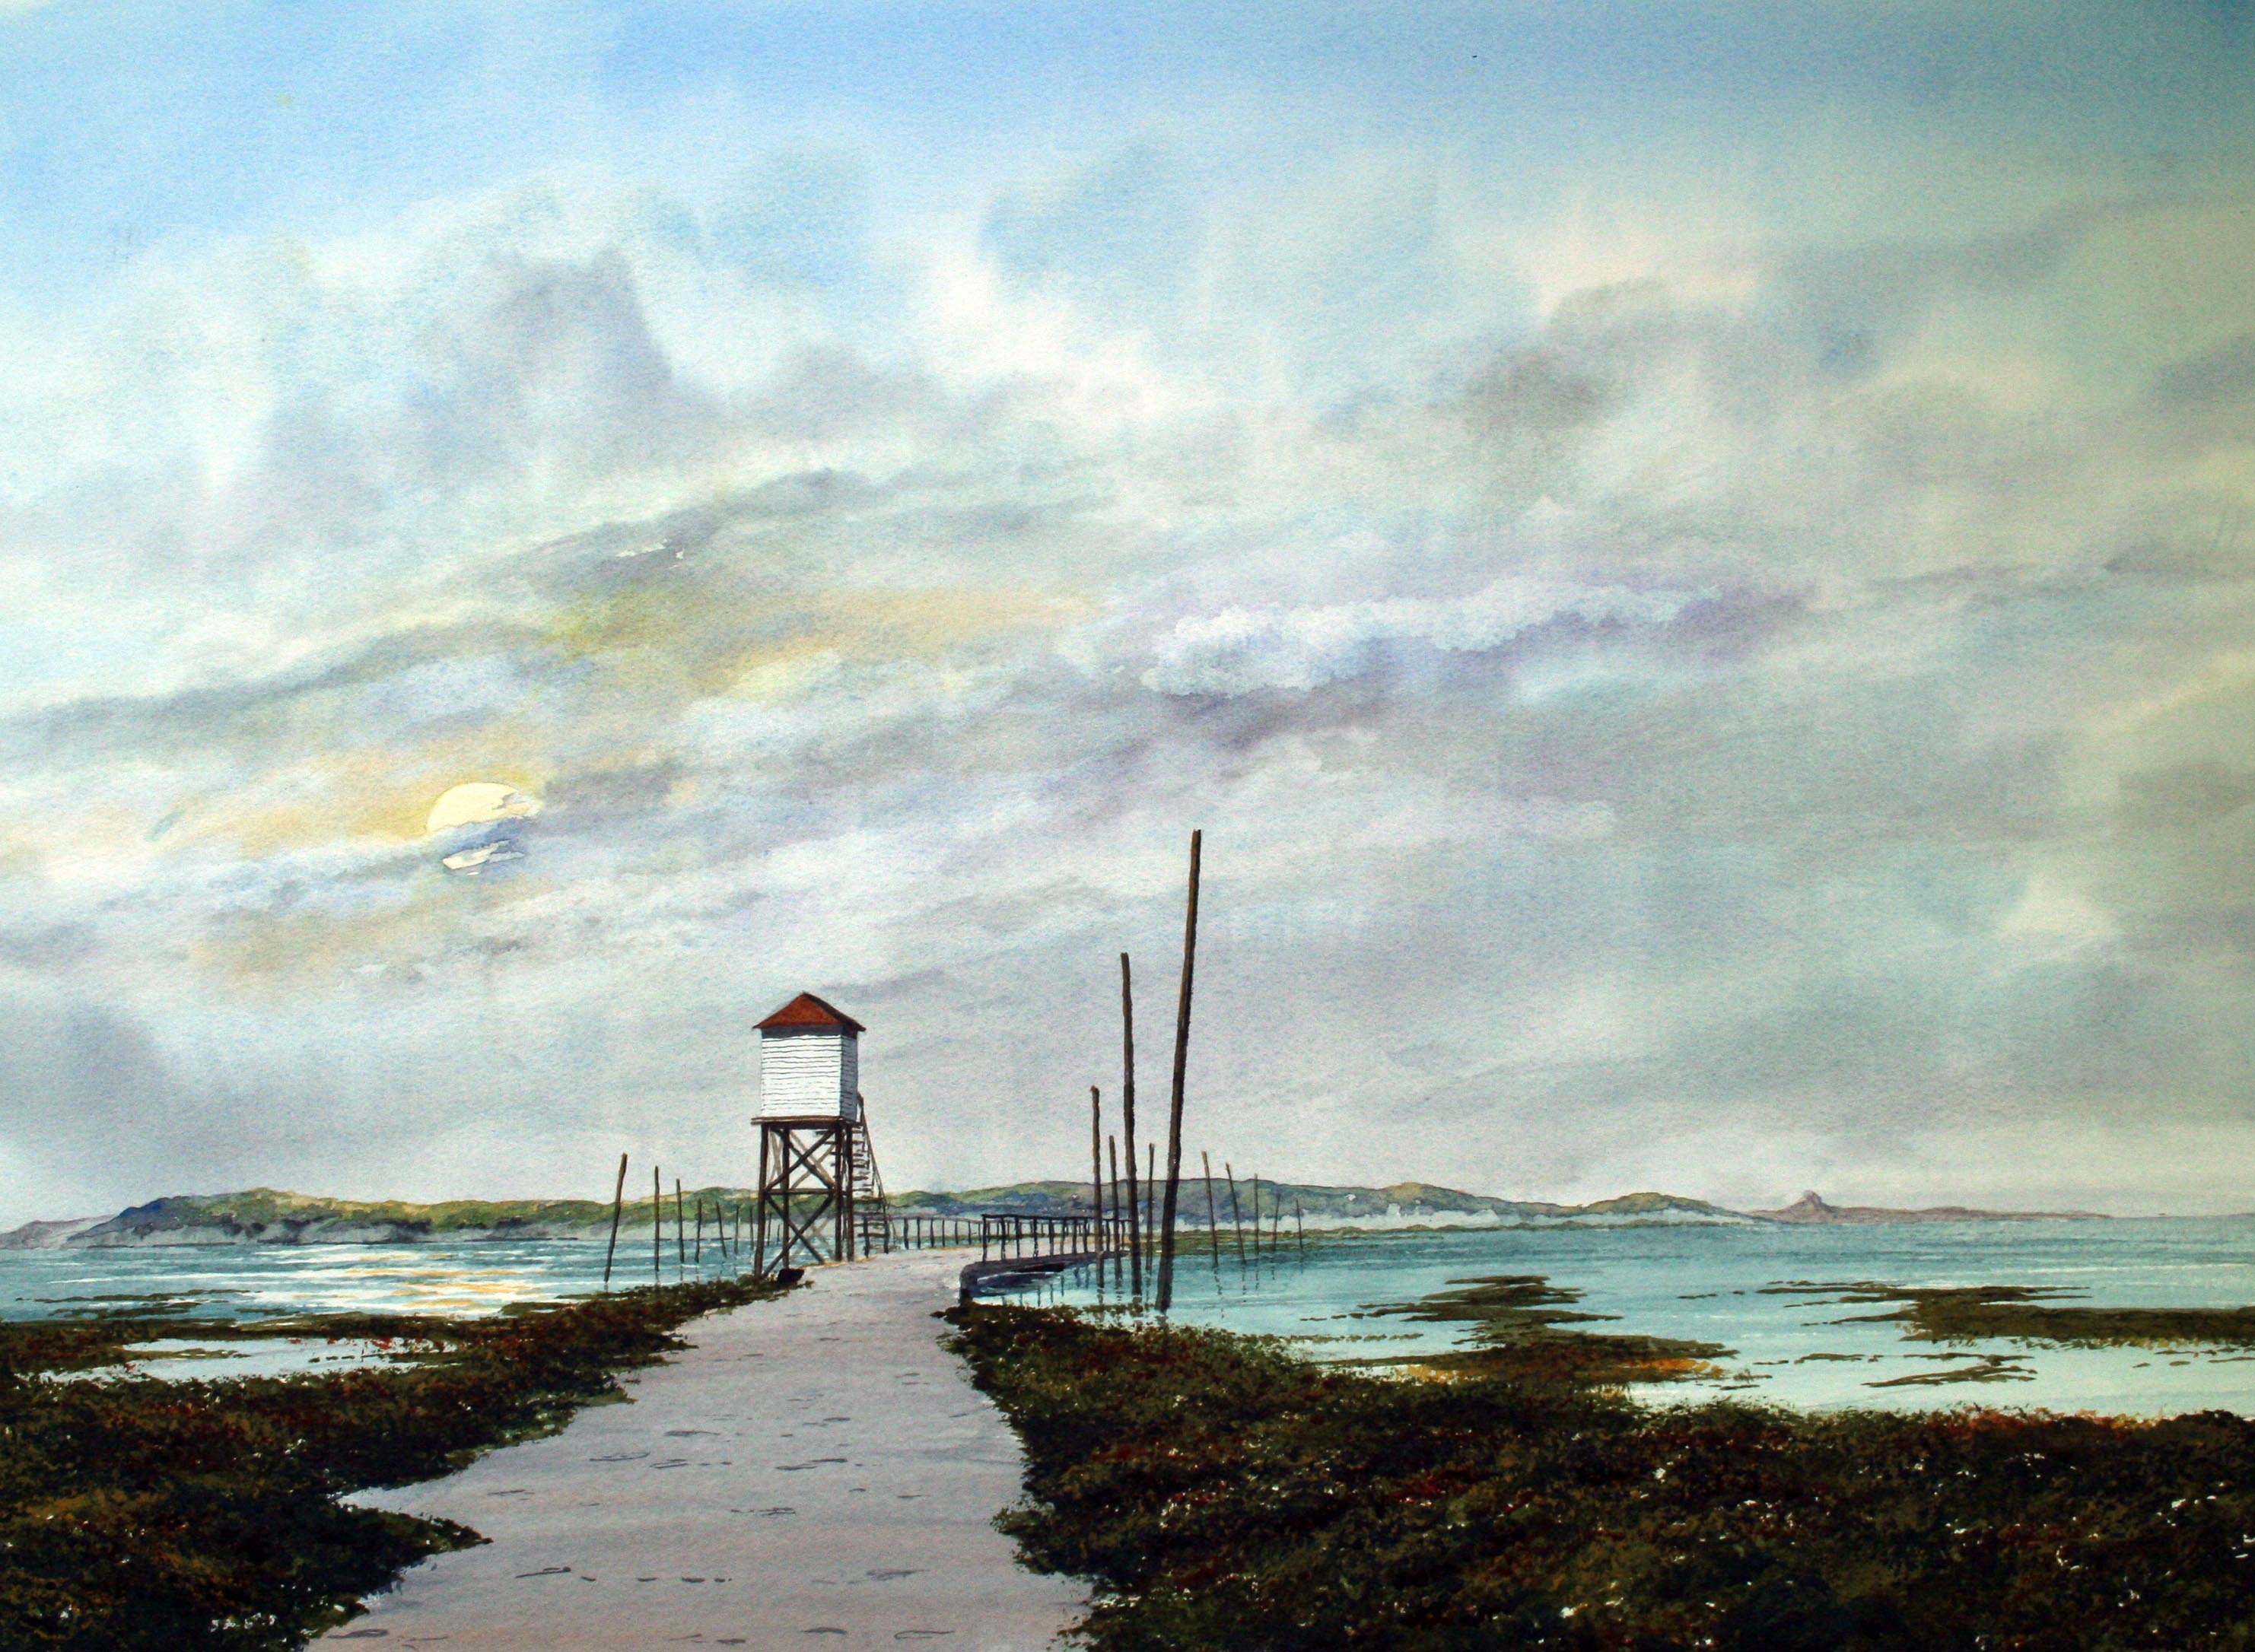
Step 5 :
For the final image I have put a few speckled bits in the road, using
cobalt blue and burnt sienna nice and dark and for the shadows add a
tiny touch of alizarin crimson for the last mix which makes it slightly
warmer and simply drag the mixture over from the left. Finally with my
No 3 rigger, a few ticks in the sky for some birds, adds just enough
life, along with the two shadowy figures on the road in the same colour.
And there we go a very atmospheric view of the road over to Lindisfarne
and incidentally this one is a HUGE painting for those of you in the
know in paper sizes, its full imperial size. |