|
|
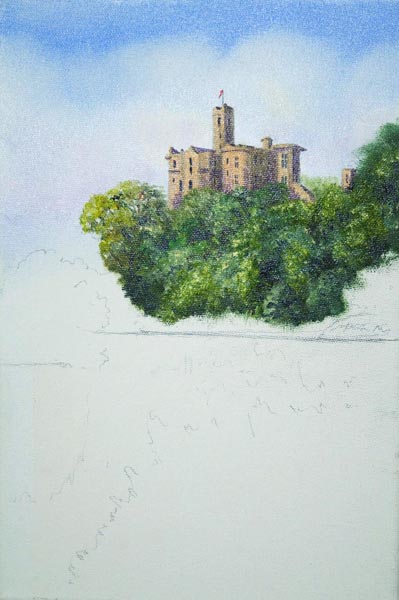
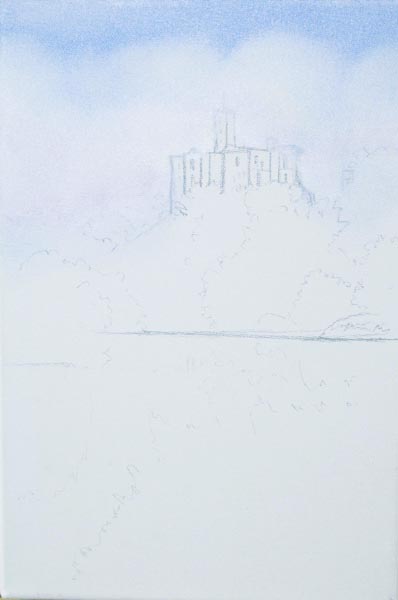
Step 1 :
In the first image you will see that I have done a very simple outline
pencil drawing. Lots of people pre stain canvases and then do the
drawing with a paintbrush and paints, personally I find this all this a
bit time consuming on waiting for bits to dry before you can actually
start to slap the paint on.
With my drawing I don’t use a heavy weight pencil because this can
smudge and become a bit of a mucky mess if you are not careful. Once I
got the drawing on I use a No 18 Georgian wash brush and firstly put a
lot of titanium white into the bottom part of the sky then put a tiny
touch of cobalt blue into my white for the rest of the sky. In the base
of the cloud areas I put a little bit of permanent magenta into my blue
and white mix which give you a warn cloud shadow. Then simply get an old
rag and pull this all together rolling the white into the white of the
clouds up into the blue.
|
|
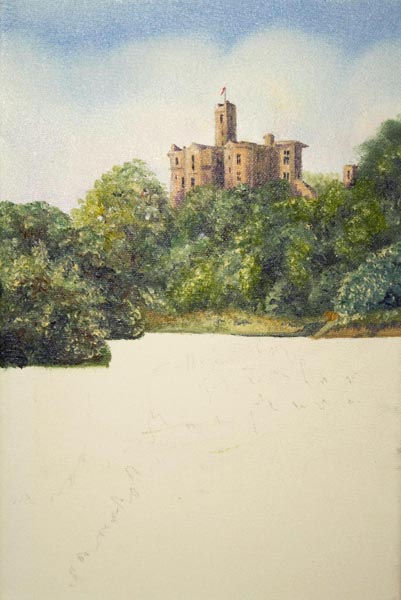
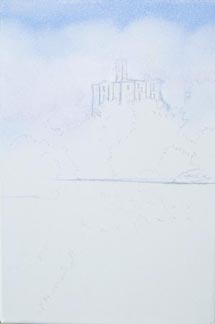
Step 2 :
For the stonework of the castle itself I used a mixture of raw sienna,
titanium white and a tiny bit of raw umber. This will give you the
lovely soft sandstone colour of the buildings around here in
Northumberland. I used my No 4 round brush which is just a little
synthetic brush. Get the lighter side of the castle in first.
For the darker side of the castle I have used the same stone colour mix
but just put a tiny touch more raw umber to darken slightly and again
using my No 4 round brush. I find a little synthetic brush for this kind
of thing more useful because they are not too stiff like most oil
brushes. You can get into those tiny little corners.
For the window colour I have used a mixture of paynes grey with a little
bit of raw umber into it. This will give you a lovely dark colour
without going to a black which can tend to me a little bit flat and
dead. Again I have used my No 4 brush, but while I was in with this dark
I also painted the flag post, same colour, but with my No 3 rigger.
Again just a little synthetic brush.
Interestingly at this point I should tell you the mediums I use in oil
painting. As in most studios you can tend to get a heavy build up of
fumes which can give you a bit of a headache or make you feel slightly
high (makes me feel like being back at art college back in the
seventies!). There is an alternative these days of course, which is low
odour thinners, or in my case, Zest It. Which are very safe and there
are no headaches. Its actually made from orange peel or at least that’s
one of the ingredients. I use this to slosh out my brushes and also a
little dip to put into the mixes. The other thing I use is something
called oil painting medium which is a lovely thick gloopy liquid which
has got various oils mixed so those are the only two things I need.
|

|
|
 |
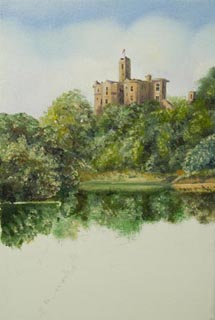
Step 3 :
In the next image you will see that
I put the shadow in which gives the whole building more dimension and
shape. This mix was cobalt blue, paynes grey and my permanent magenta,
again applied with my No 4 round brush. Obviously this is applied to the
darker side of the buildings.
Also I have added the flag which is a little dash of cadmium red and put
on with my rigger brush.
|
|
Step 4 :
Now its time for the trees. There
are a lot of these, it could be very complex, but don’t go into painting
individual trees. I use my No 10 Georgian filbert and literally bash on
first of all mixes of hookers green and raw sienna, then hookers green
and burnt sienna. For the darker areas I used a mixture of cobalt blue
and a touch of paynes grey to darken it slightly and get some shadows
into those trees, followed by naples yellow good and strong. Then I kind
of just tapped it about a little bit with my finger spreading and
merging the colours slightly.
|
 |
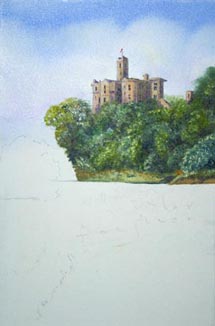 |
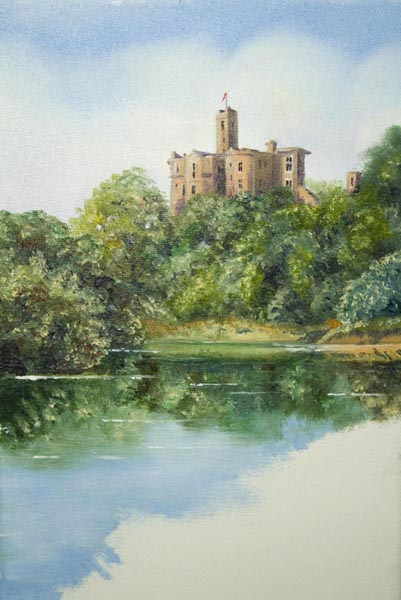
Step 5 :
For the bank I use my
raw sienna followed by naples yellow and then again little bits of
shadow here and there using cobalt blue and paynes grey. Then with my
finger just rub in a little bit of titanium white to add some light onto
the bank.
|
|
Step 6 :
The bushes on the left, I have used
the same mix of hookers green and burnt sienna, but this time add some
cobalt blue to the mix. Then again some naples yellow nice and strong.
This I did with my No 10 filbert. Conventionally that should have been a
fairly scary clump of trees, doing it this way, its not that difficult.
|
 |
 |
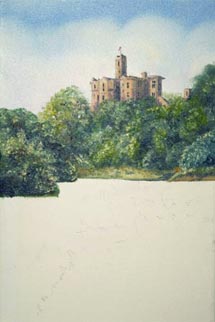
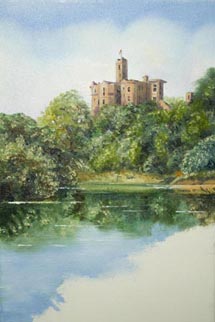
Step 7 :
In the next image you will see I have started the water by putting in my
reflections. You know what I'm going to say, just repeat the colours
underneath which you have already painted above. But don’t keep to
slavishly to detail you are just blocking in colours.
|
|
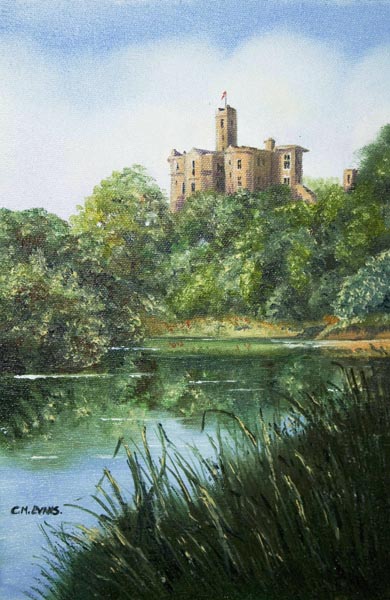
Step 8 :
Then in the foreground of the water cobalt blue mixed with titanium
white fairly strong then as it joins the reflection of the trees just
gentle smooth it up into the green creating a nice soft hazy transition.
With my rigger brush I put a few little white lines here and there to
give a little bit of light to the surface of the water.
|
 |
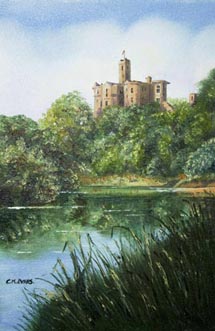 |
Step 9 :
For the final image its that big
chunky bit in the foreground and I have firstly used hookers green and
raw sienna with my filbert brush the on top of this hookers green and
burnt sienna.
Then the bottom right of this clump add a bit of cobalt blue and paynes
grey mixed and stroke this upwards. Finally with my rigger brush out of
all this mess I have pulled up some strands of grass and then laid on
top of this a few strokes of naples yellow, again with my rigger brush.
Still with the same brush, on that far distant bank I have popped in a
few little cadmium red blobs here and there.
Hey presto Warkworth Castle in oils. All painted in portrait format on a
stretched canvas. |