|
STAGE BY STAGE |
|
Now for a
simple little autumn scene with all those gorgeous colours associated
with autumn.
|
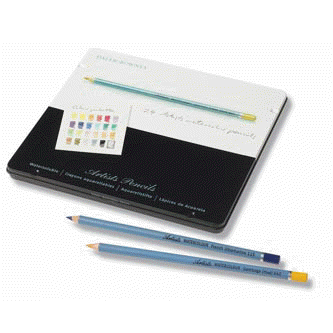
Essential
Supplies
The items you will need to complete this scene are as
follows:-
|
 |
|
|
|
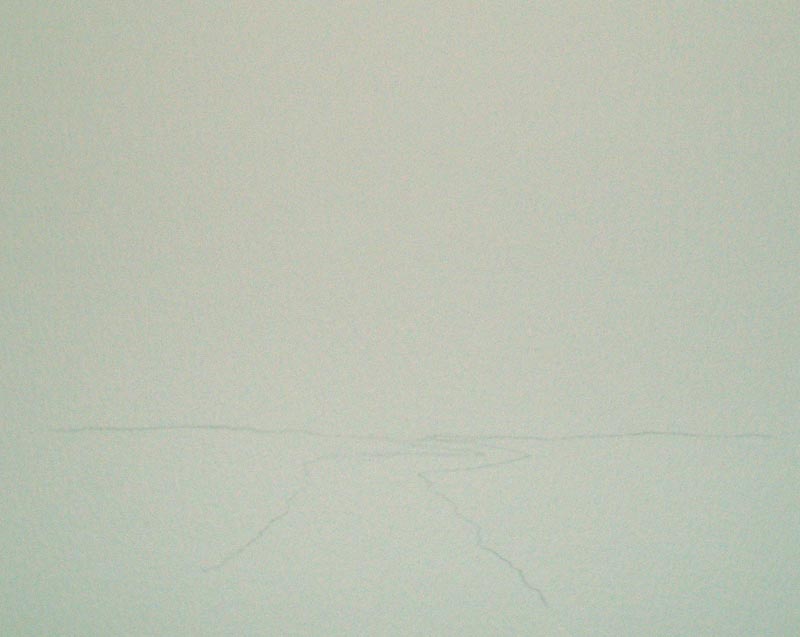
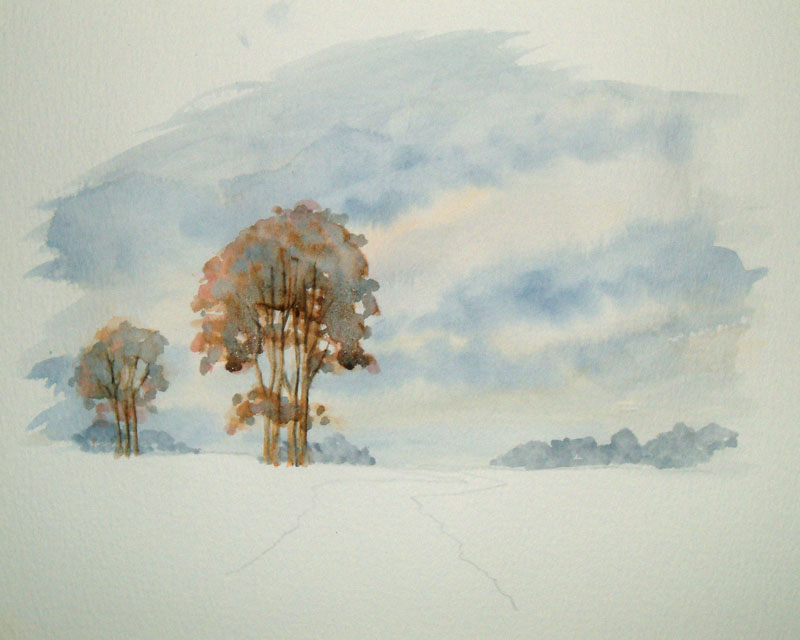
Again with my cool
grey, simply map out with a few lines the main structure of the picture.
Obviously, because there is going to be trees coming up into the sky, I’m
not going to draw all of these before I have my sky wash done. So that
really is all I need for my outline drawing. |
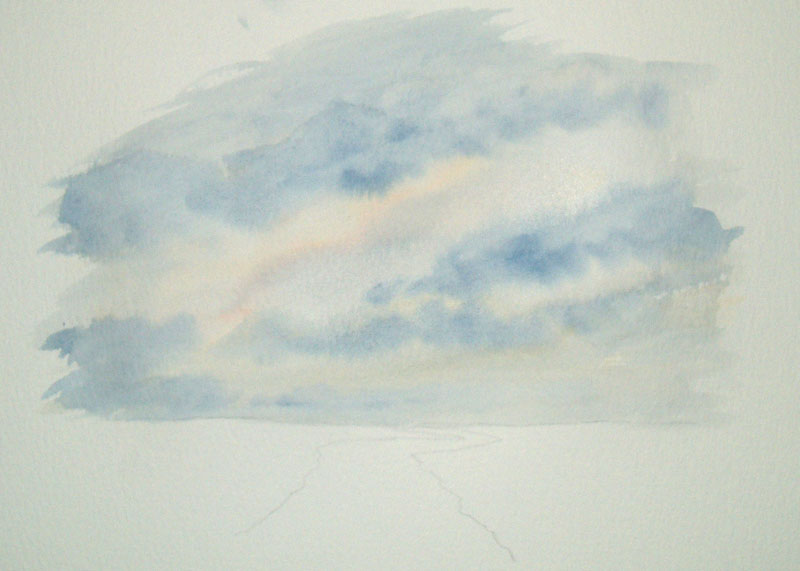
A slightly more
complex sky this time, but again taking the paint off the pencil with a
wet brush, a little bit of yellow ochre to start with, followed by a
little bit of light red. Remember in any kind of scene, build up the
mood and atmosphere that you want and for this obviously I want to get
autumnal colours in there. The main blue is indigo.
Then again indigo slightly darker to intimate a few clouds all whilst
it's still sopping wet, so don’t fiddle and don’t mess about.
|
|
|
|
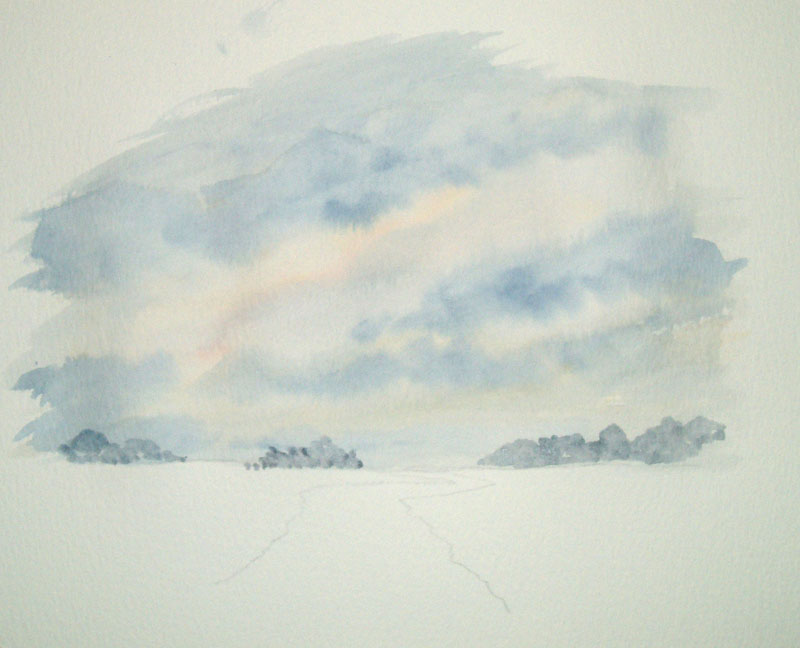
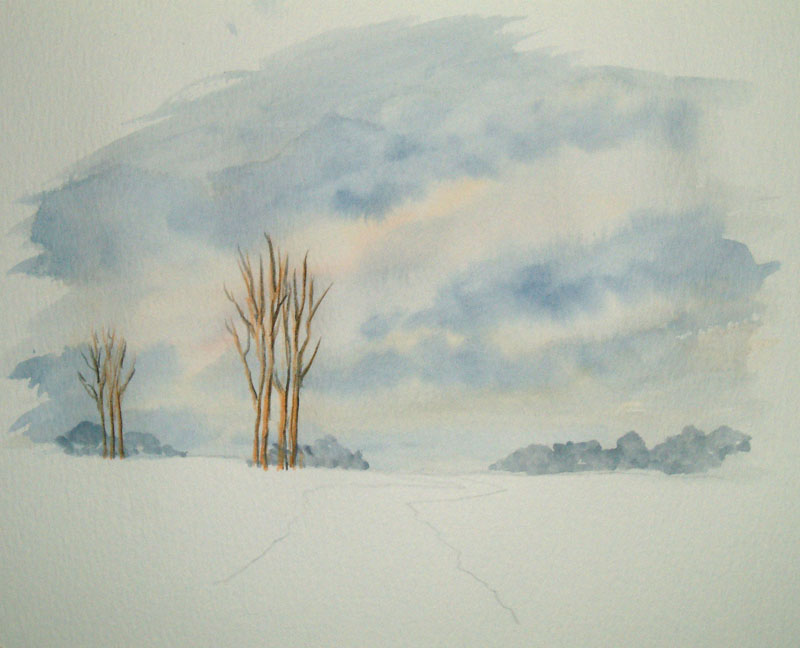
Whilst this is still
ever so slightly damp, I am going to my blue-grey taking the paint off the
pencil with my No.8 round brush and simply drop in some blobs in the far
distance on my horizon line. These will eventually turn out to be
distant trees a long way off. This needs to dry before drawing my main
trees.
|
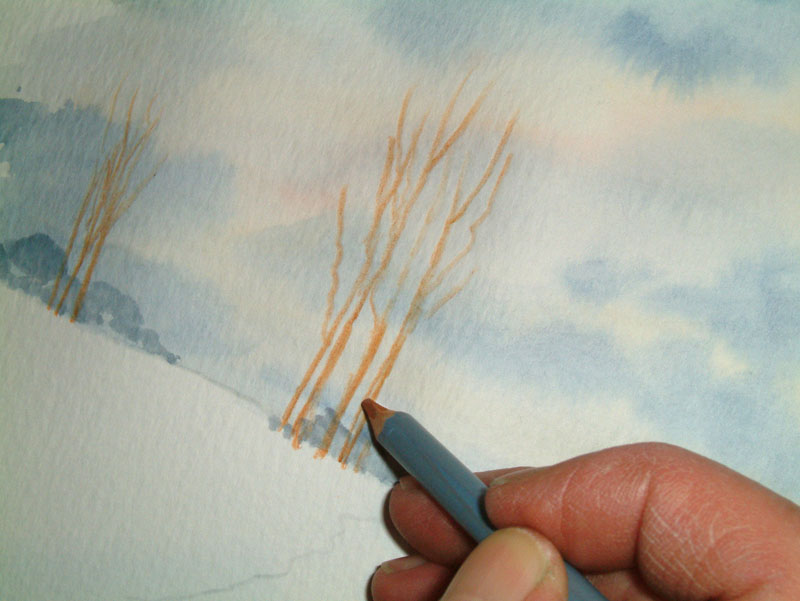
Now all my distance and
my sky is dry. Let's draw on some trees, bigger more impressive chunky
trees. I am starting off with a bit of raw sienna and very simply drawing a
few sticks with some twigs coming out of them. Followed by a little bit
of Vandyke brown, then a little bit of the black which is mars black.
|
|
|
|
I've already told you
why I use watercolour pencils, and the reason being it is such a handy little
medium but for most people painting outdoors on location is a bit of a
nightmare quite frankly. That’s because wherever you sit at your easel
there is always going to be lots of people coming over to look over your
shoulder, but once you sit yourself down on a park bench, the nearest
rock or whatever, armed with simply a sketch book, a little tub of
pencils and a brush you don’t draw much attention, but you do draw some
lovely pictures whilst using watercolour pencils. Capturing all the
light and colours but because you are working on a sketch you
automatically cut out lots of unnecessary clutter within the landscape
in front of you hence making it easier to work this into a full
painting at some later stage. Also on holiday they can be very personal
memories which can be much better than photographs. Also it is a lot
lighter to carry in your luggage.
|
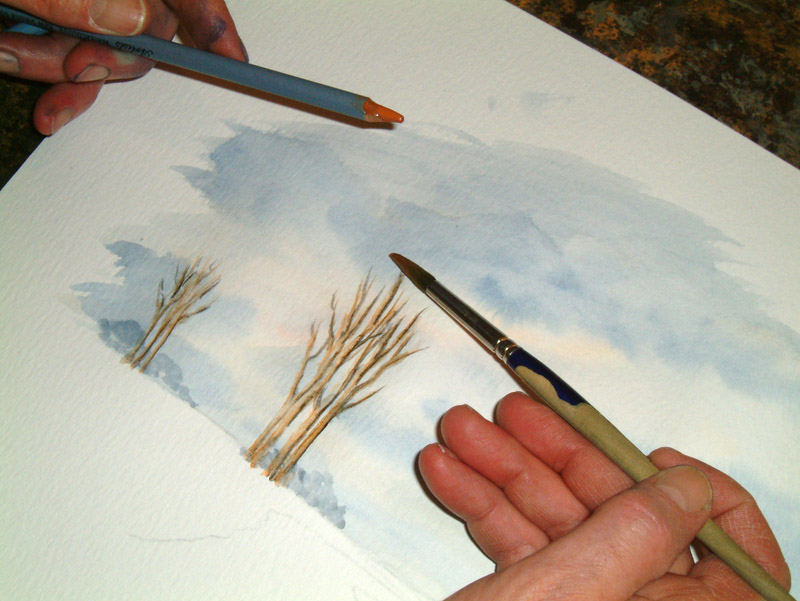
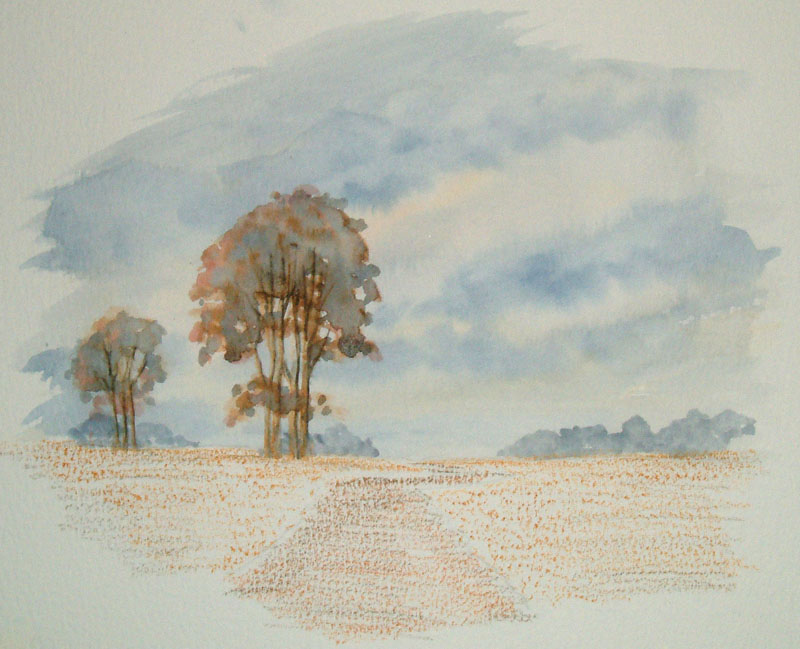
Now for the main
structure or skeleton of the trees, I could leave them like this without
any water on them, but they could be slightly hard and sharp edged which
I don’t want. I want a rounded feel to my tree trunks rather than flat
so before I go any further it's time for some water.
All I am doing with the tip of my No.8 round brush is stroking over the
tree trunks, this softens the colours and helps to give a rounder look to
the tree trunks, but notice now I have my light to the left, mid tone
down the centre and dark to the right. |
|
|
|
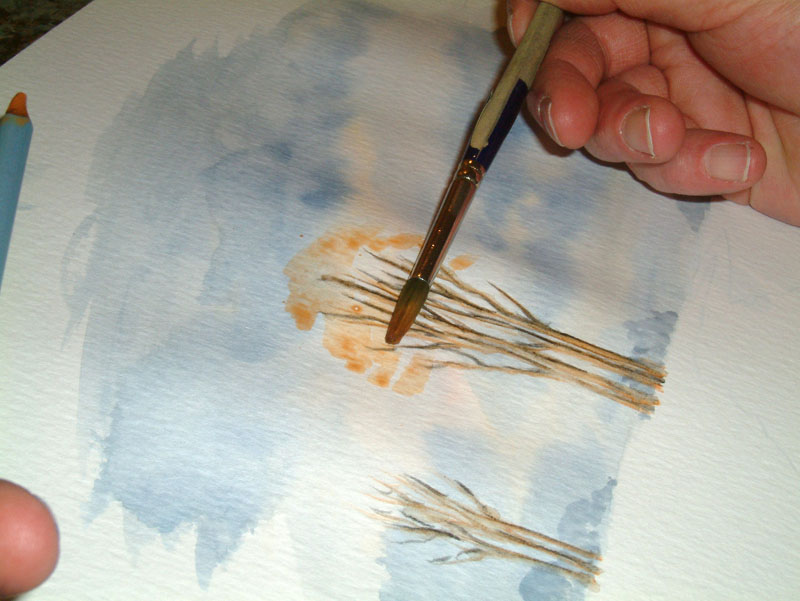
Now for the top bits.
I’m starting again with my round brush stroking off paint from the
pencil and actually applying on the painting with the side of the round
brush.
|
|
Now
in a similar manner a few stokes of light red, also some of my blue-grey.
|
|
|
|
This is a very simple technique and I'm
sure you will agree, very effective. |
|
Now for the foreground
areas and moving swiftly to my yellow ochre and just scribbling in, but
not going into the path. Using the side of the pencil, just like any
other pencil you can get different effects by using different parts of
the pencil. Incidentally, don’t use a pencil sharpener on your
watercolour pencils, use some kind of blade to sharpen them, because a
pencil sharpener will give you a very sharp point and make the
watercolour pigment very brittle so it breaks quicker and you waste
more pencils. Also, if you use a blade to sharpen them then you are going
to have more angles to your pencil end. Into the path I’ve stroked on
with raw sienna with a tiny touch of Vandyke brown on top. |
|
|
|
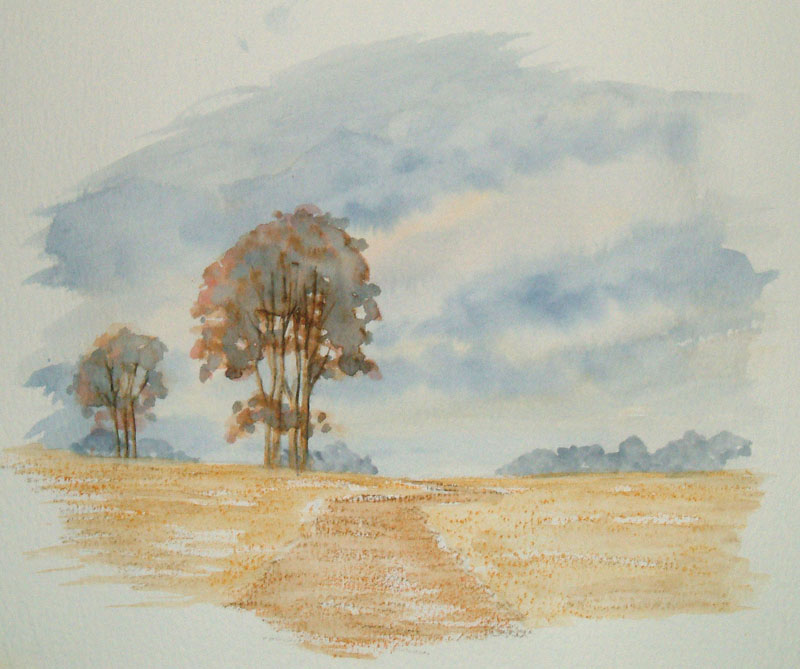
Now again it's time for the water, using my large ¾" wash brush
stroking in all the areas that I have pre drawn, but instead of doing big
blank washes, daub on here and there leaving a few bits unpainted just
leaving dry pencil.
|
|
To add a few scary
bits, shadows coming across from the trees, for this I am using indigo
and purple-grey mixed on the pencil. Also whilst you're doing this, don’t
just stick to stuff you can see, add some shadows that are out of shot.
A few flicks in the base of the clumps of trees with bring these down to
the ground, still with the indigo. Also a little bit of shadows to the
left of the path. |
|
|
|
A couple of tracks on the path, still with the same brush and just daub
on with indigo using the tiny corner of the brush.
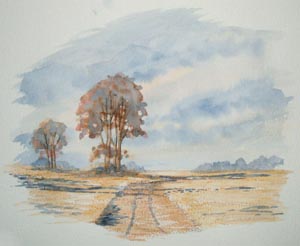
There we go a very simple autumnal scene with very little effort. |